| 8/24/03 |
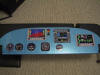
I started the
process of visualizing my IFR panel. Here's the first shot.
And all this can be yours for only $35K!
 |
| 9/15/03
revised 1/14/04 |
Several items I want to include on the panel include:
TruTrak
Digiflight 200 Autopilot Two words, Safety and Luxury. This will
provide the redundancy if the EFIS takes a dump. I'm going
with the
Digiflight IIVSG.
Grand Rapids Technologies EFIS
Horizon Series 1 (dual) on seperate bus. The second one will show EIS/Graphical Engine Monitoring.
Garmin GNS 430.
I'm going to go with a one vendor approach for the avionics. I think
they will integrate easier.
AOA pro indicator.
If NAVY pilots use it why shouldn't I?
Thinking about a single alternator, dual buss, dual battery combination.
It's probably overkill.
Stand-by systems will include an AI, Airspeed, Altimeter.
|
| 9/21/03 |
Now I'm starting to think that I don't need the Stand-by
instruments. If I have each GRT on a separate buss with dual
alternators and batteries I think I'm good as far as independent redundant
systems. I don't know yet. |
| 11/15/03 |
Second pass at the panel. I think that three GRTs
are better than two. I'll have two AHRs. The two on the left
will show primary instruments and the one on the right will show engine
monitoring. Minimal backup instruments.
 |
| 1/12/04 |
Ok, I've revised again. I'll go with just two
displays, one AHRS, the engine monitoring, ARINC, and Fuel Flow options
from GRT. Looks similar to the first panel, but I've yet to revise
the pane to my likings. Flip, flop. |
| 1/13/04 |
Well it's a new year and I'm only now starting to get back
into the swing of things since the holidays. I haven't done a damn
thing in two months except scratch my head a thousand times thinking about
exactly *What* did I want in my airplane with regards to engine, prop and
avionics; THE biggest chunk of money this airplane was going to take
up. I've read all the stories about minimal VFR aircraft flown only
in daylight and they cost only $40K (or less if you can believe it).
No way. I want a new engine, I want it to be fuel injected,
horizontal induction and with electronic ignition. I want a prop
that kicks ass. It has to be CS, sorry no reasons given. (ok
performance) I want a panel that works, and it should look like a
spaceship, and be safe, not in that order exactly.
And I'm probably going to only build one airplane in my lifetime, if
it's the right one. So empty the bank accounts.
I've got the loan, the paperwork is almost finished. Still need
to get a copy of my N# registration out to the bank. A copy of my
liquidity ($$). Verification of Insurance. (long story, see
below). And a Bill of Sale from Vans which I didn't get upon my
first order.
There has been many questions placed about the process by which you
finance your build if are not rich. I make a good living but I'm not
rich. So I planned from the beginning to financing my aircraft.
If you are curios, I've made notes of my journey below. If you have
already done this or just don't care go
here. :) Dan's a hell of a
nice guy and his website is awesome.
Ok let's start. Here's what you will need.
- Fill out or print a copy of the Loan Application from
NAFCO . I haven't tried any other loan shops but Jim Jansen
has been very kind and helpful and I feel I'm getting a good service.
And there aren't too many others out there either.
- Copy of your last two years taxes. I couldn't find one years
forms but I did have a copy of my W2 and that was acceptable. Your
mileage may vary.
- Gather every piece of the airplane you want to finance and get as
much information you can about what you are buying. Do this several
times, every time refining the airplane and the costs. Get many
quotes from many vendors. I did this for the engine, avionics, prop
and firewall forward kit. The spreadsheet is located
here at the bottom.
But I did change vendors for one portion for the original spreadsheet.
Make sure you get pricing on everything thought of. I plan on paying
the taxes and shipping and a few other instruments out of my pocket.
To give you an idea, I had originally wanted to buy the Whirlwind 151
prop. Found out they won't sell it to me because my engine is
electronic ignition. So I had to change the prop to the WW200RV.
I just think the 3-bladed props are just dead sexy. Fortunately the
vendor and price are the same. At least I won't have to spend $1200
more for the Czech prop governor. Vans governor comes in the FF kit.
Nice tradeoff. Do your homework.
- The reason you need the above is that you must provide a Pro Forma
Invoice from each vendor. When you get approved you will get checks
made out to your listed vendors in the amount of the Invoice for each.
You will have 60 days to spend the money, then the checks are no bueno.
Asks for this from each vendor.
- You will need to provide Invoices from Vans showing kit delivery to
date.
- You will need to provide pictures of the parts completed or not yet
completed. Having a website is great. You just give Jim the
web address.
- Fax all this in. Answer any questions they may have over the
phone.
- Wait a few days and hopefully you'll get a nice call, and a scary
one. I was provided with a loan of almost 64K with terms of 7%, not
too bad for something that doesn't quite exist yet.
- Insurance. The evil. I bought builders insurance up to
$75K when I started building. That's what I thought the plane would
cost when completed. What a joke. Anyway, turns out that I may
have to get *full* coverage (flying) because of the loan and the need for
a Breach of Warranty (BOW) that the bank is asking for. That's to
keep me from flying an airplane with no wings and crashing into someone's
house and asking the insurance company to pay the bank and then the
insurance comes after me. Phew! I don't know the outcome of
this yet. I'm not sure if I will have to pay full insurance
($1920/yr) or builders insurance ($400/yr) while I'm building, because of
the loan.
I'll let you know tomorrow, when I know, what the outcome is. JT
at
Nation Air will call Jim Jansen tomorrow to see what they can work out.
Now if could just find a hangar nearby... |
| 1/14/04 |
Well it's all sorted today. JT is going to work with
EAA Insurance and they can provide the BOW and I won't be required to
maintain full insurance. Right now I'm paying $400 for 75K worth of
builders insurance. Starting tomorrow I'll be paying $700.
It's a far cry better than paying $2K/yr. Thanks to both of them for
being understanding to my particular situation and for getting this
accomplished. Now the checks for each vendor will be in the mail
hopefully tomorrow. I feel a lot more broke now. One note; I'm not affiliated with either company or
personnel. This is just my experience. |
| 1/14/04 |
Another shot at the panel. I'm not sure why I have
all these old-school backup instruments. Do I really need them?
I'm now planning on using the tip up panel from
Affordable Panels. The
layout of your instruments must conform to some restrictions regarding the
layout of the panel and the back of the panel. Using the base 7/7A
Affordable Panel cutout from
epanelbuilder you can plan on some of that. I'll bet that it
will still take a lot of time with paper cut-outs etc when the panel is
planned for real.
 |
| 1/22/04 |
Still waiting for the checks to arrive. Vans didn't
get me a bill of sale. Waiting on that to send to Jim so I can order
the avionics and engine. Still no luck getting help riveting the
fuselage :( |
| 1/31/04 |
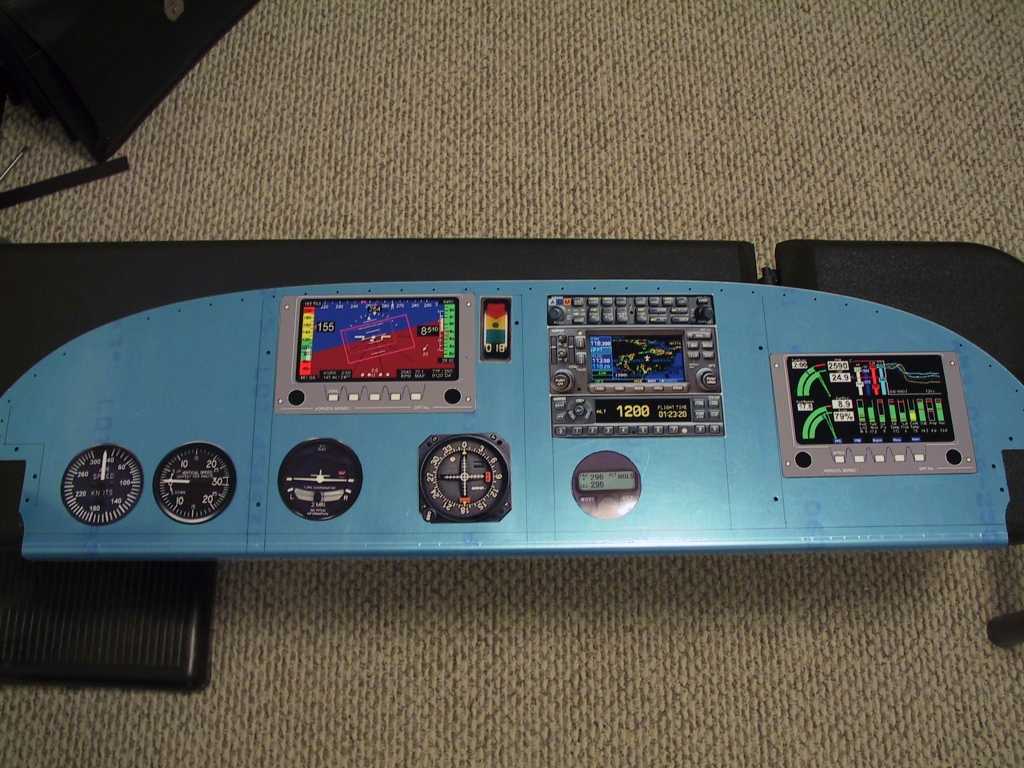
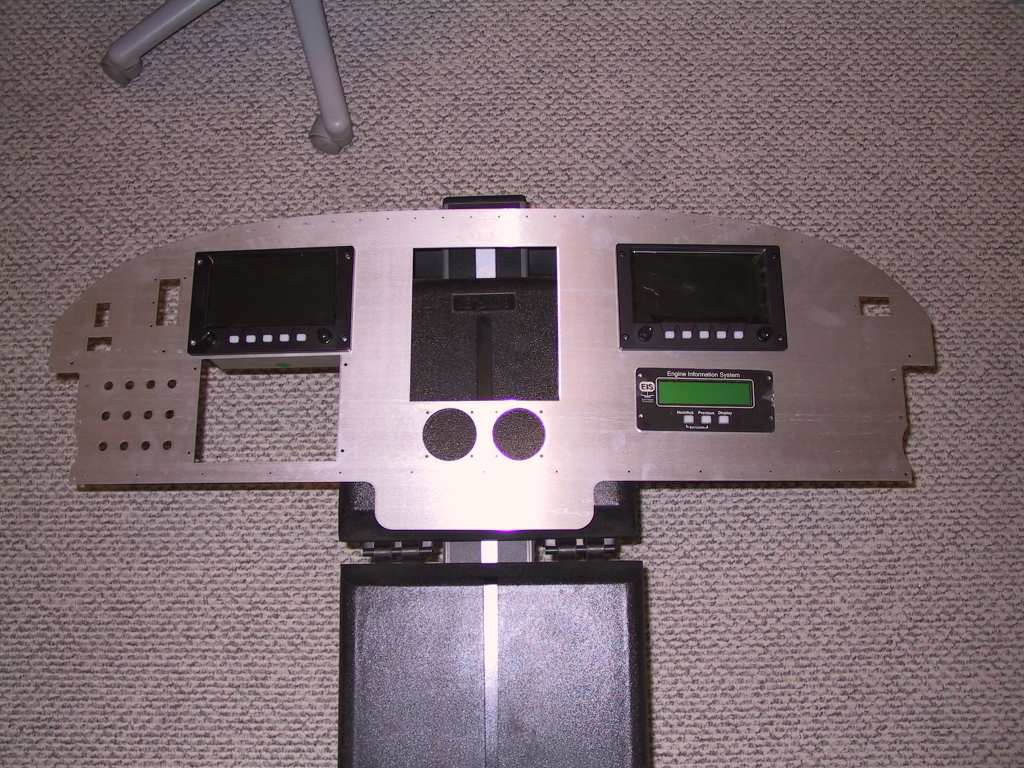
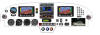
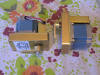
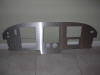
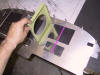
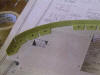
Meanwhile I've been working on the panel layout.
Here is one shot of the panel with 'scale' color pictures of some of the
big items to go on the panel. After sitting in Dave's awesome 6 I
decided that a lower panel is a fantastic feature. My knees were not
even close to the sub panel. You won't see it on the pics just yet
though.
 |
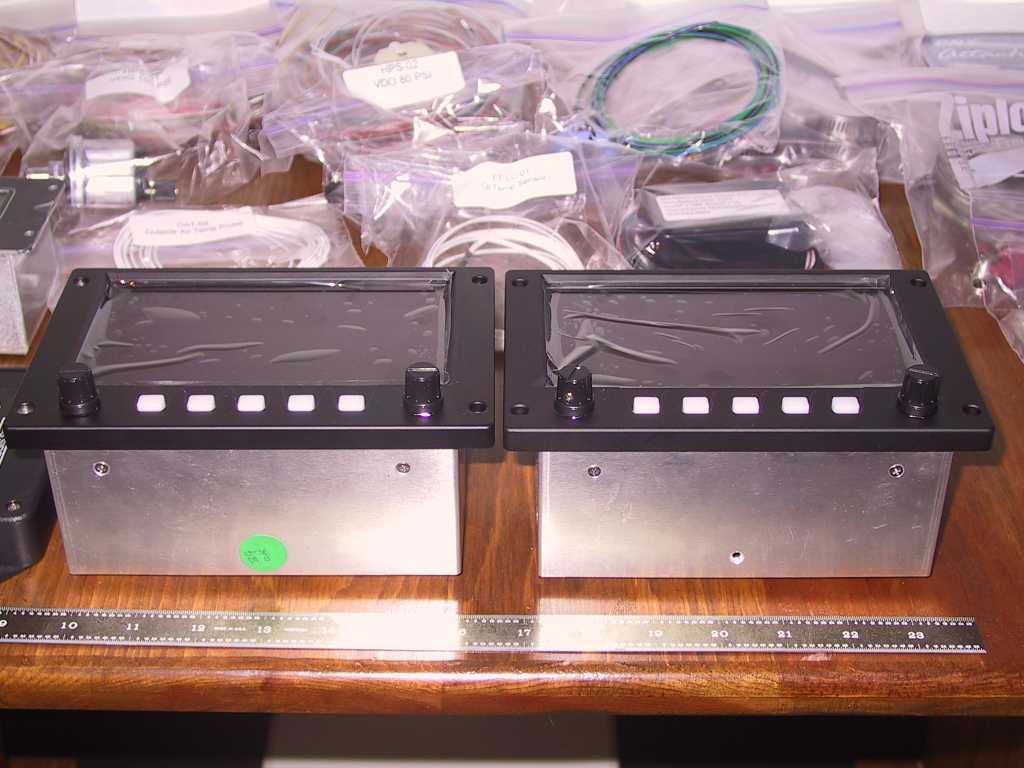
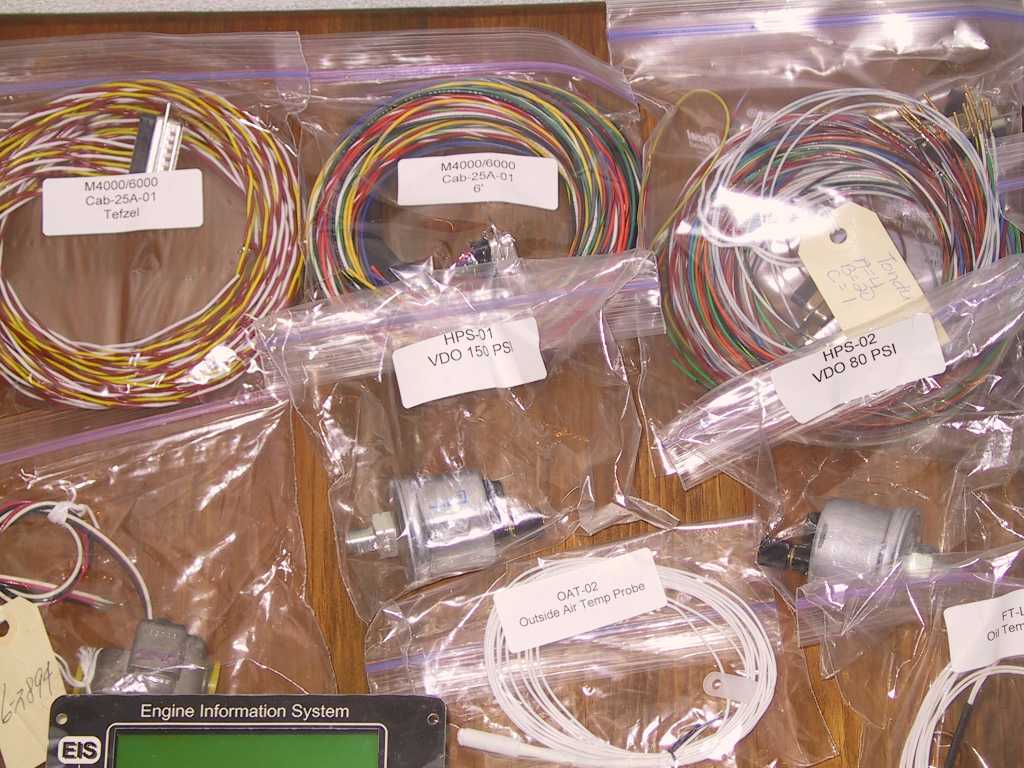
| 2/18/04 |
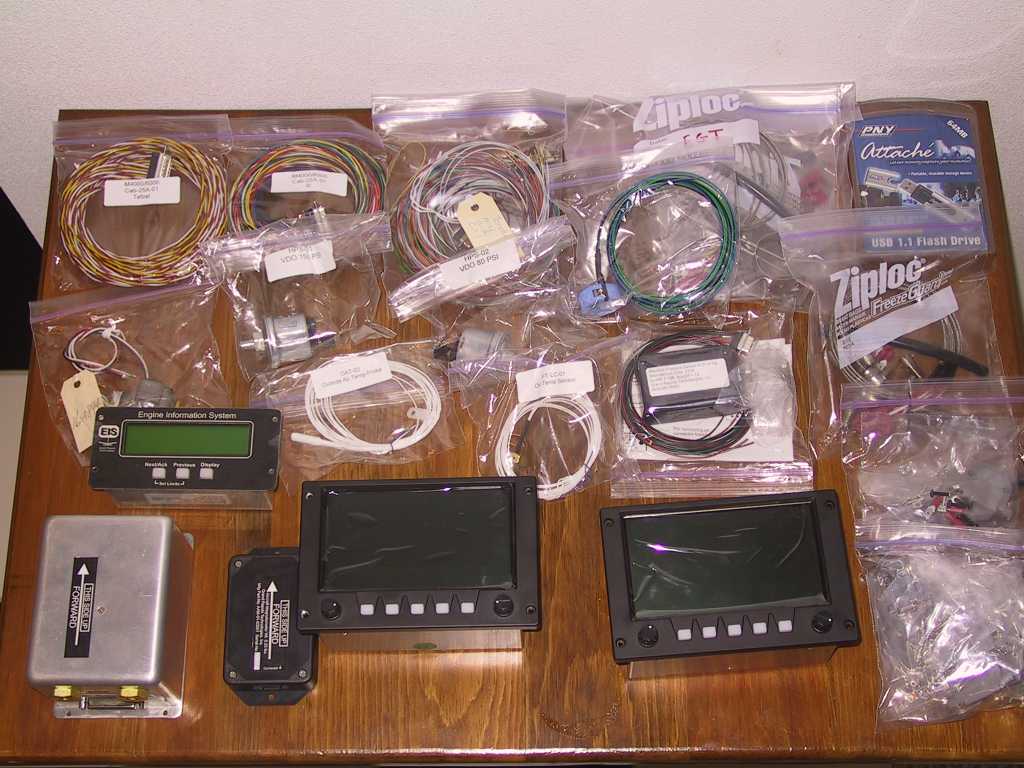
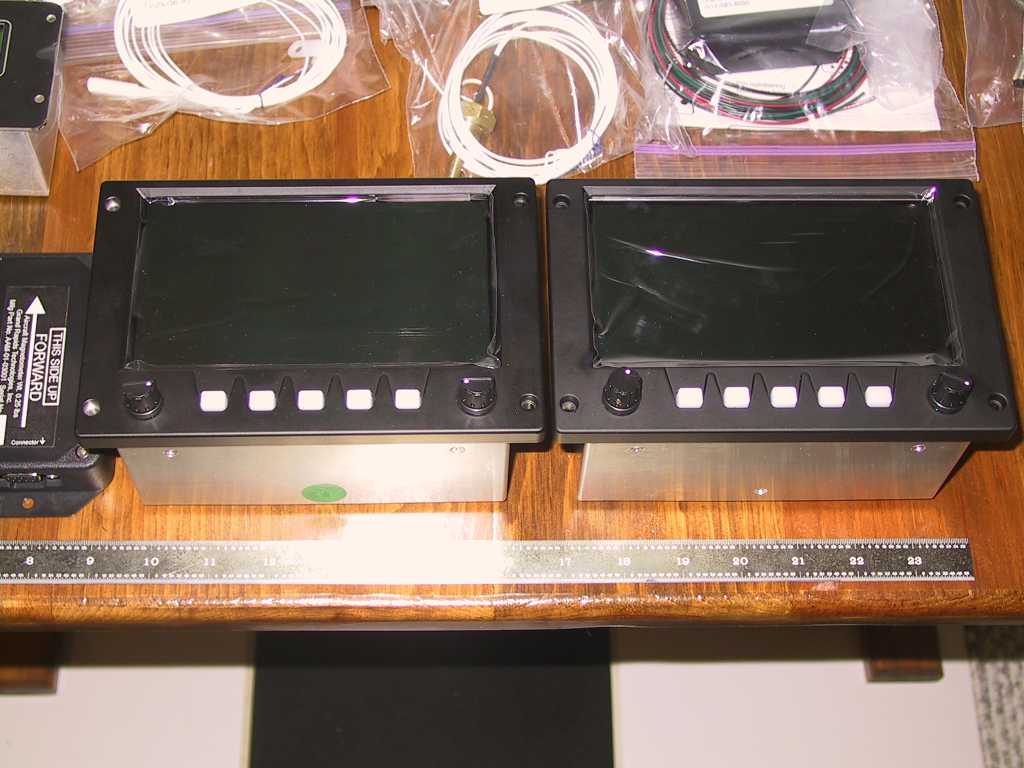
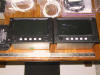
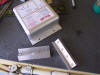
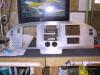
First of the Avionics and electrical stuff arrived today.
The Dual display Grand Rapids Technologies EFIS Horizon Series 1 is here
and unpacked. The displays and all parts are very nice. I
ordered a power supply and when it arrives I'll give this thing a test
drive. I'm gonna have wiring up to my elbows.
   |
| 2/22/04 |
Some changes to the Panel. I went with John Stark
for my avionics, much better pricing and he's on the ball too. Also
I'm going for the WW200RV prop. The standard governor in Van's
firewall forward kit will fit this prop and save me $1200. I also
decided on not putting the GI 106A in the panel. The GRT EFIS will
take care of that. And so with the savings I went with another Com -
SL40. |
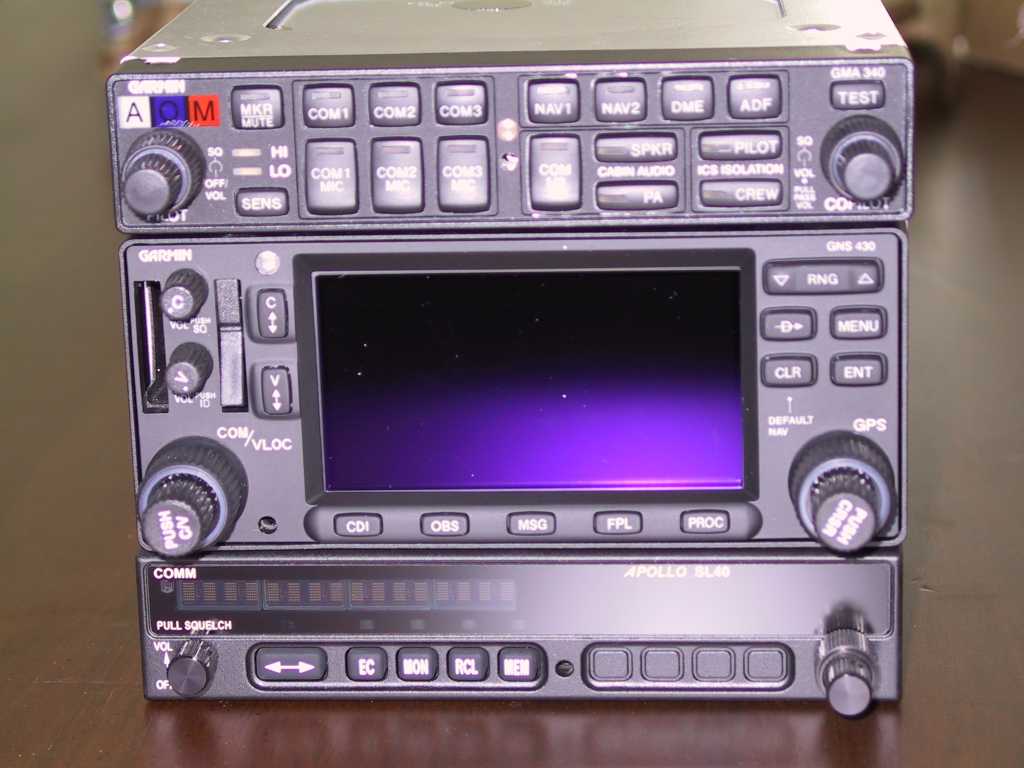
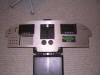
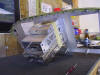
| 3/10/04 |
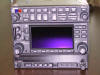
Ahah! The avionics stack, or most of it, has
arrived. Missing is the Transponder and Autopilot. I won't
hook any of this to the power supply until I get the panel going.
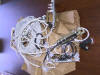
After looking at the wiring harness that John Stark fabricated, I can say
that I'm glad I didn't have to do it myself. I think I could have
but it's a big time saver.
    |
| 3/15/04 |
5 days in Cabo with my parents. What a nice
vacation! Even made the GordoBanks website with our haul, of which
this picture only shows about a third of the fish caught this day.
 |
| 3/16/04 |
Transponder came. No pics. I'll post some
later with the entire stack. I'm now pretty much firm on how the
panel will be constructed. I plan on using .080 or .090 alum. and
adding 1" in length to the standard panel. I'll create a 'Z' bend
for the sub panel and extend it to mound most of the switches. I need
to create a cad drawing of this. More to add to the to-do list.
No work on the plane today. Got in late and I'm dead. |
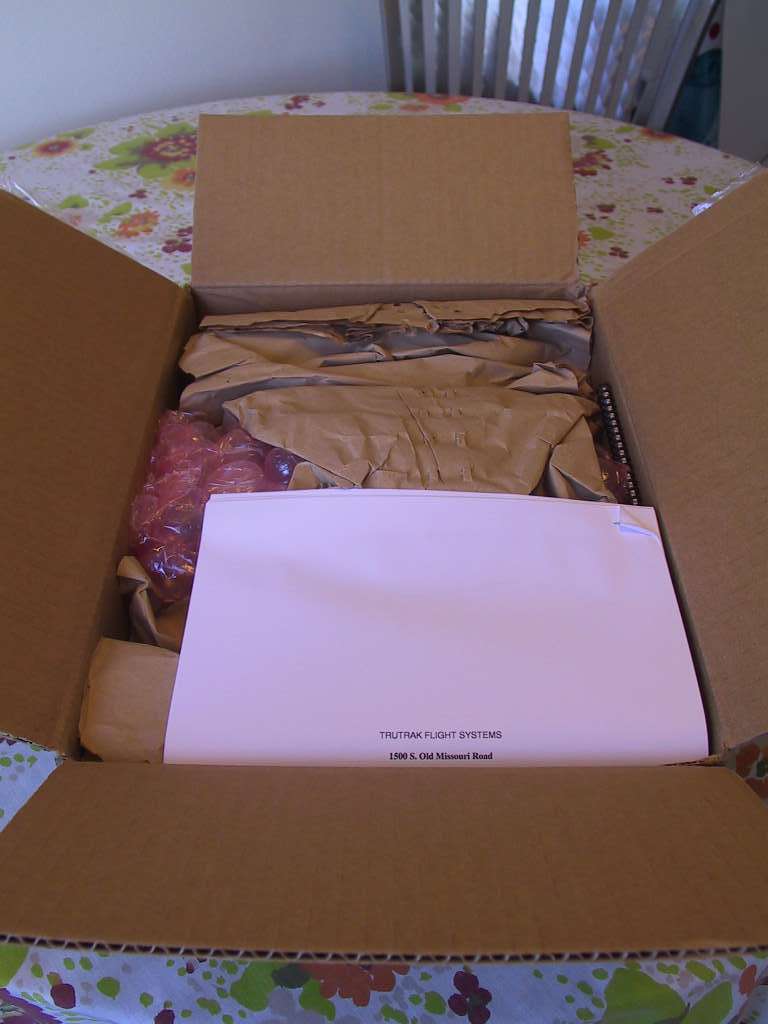
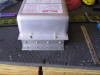
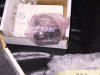
| 3/31/04 |
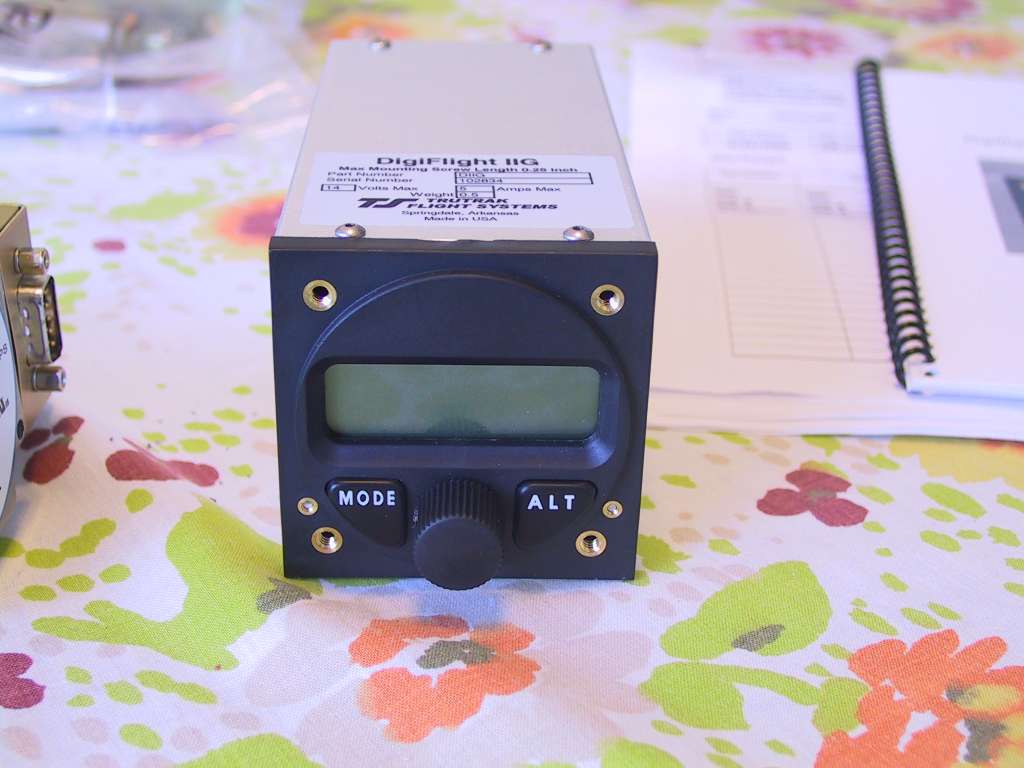
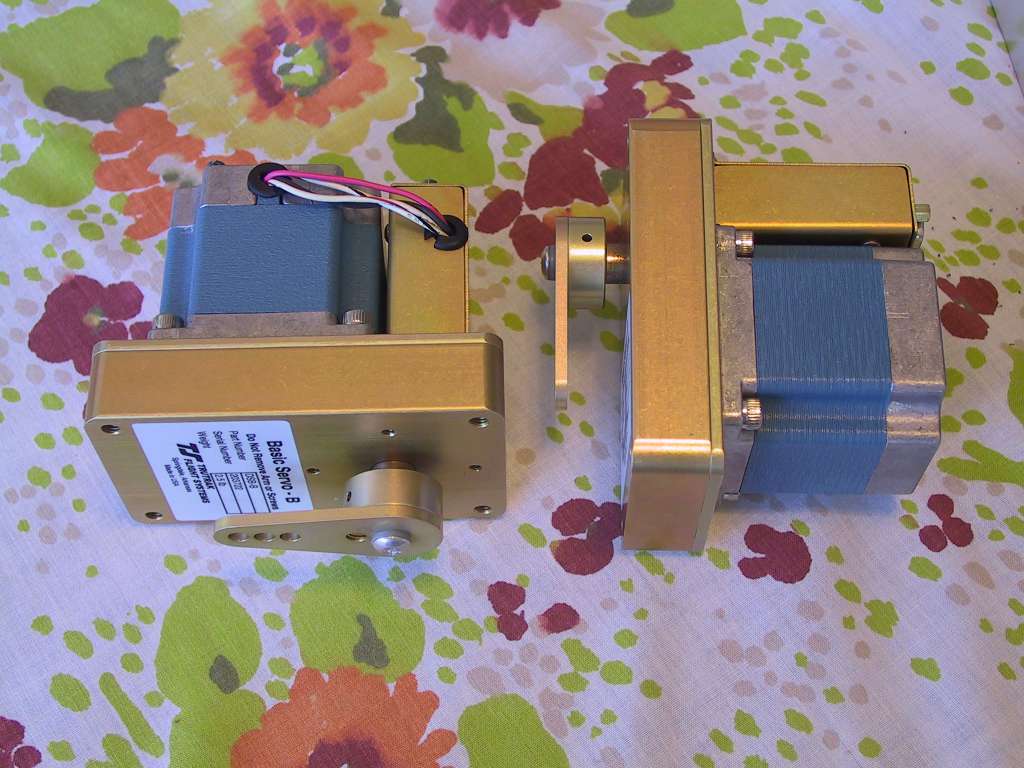
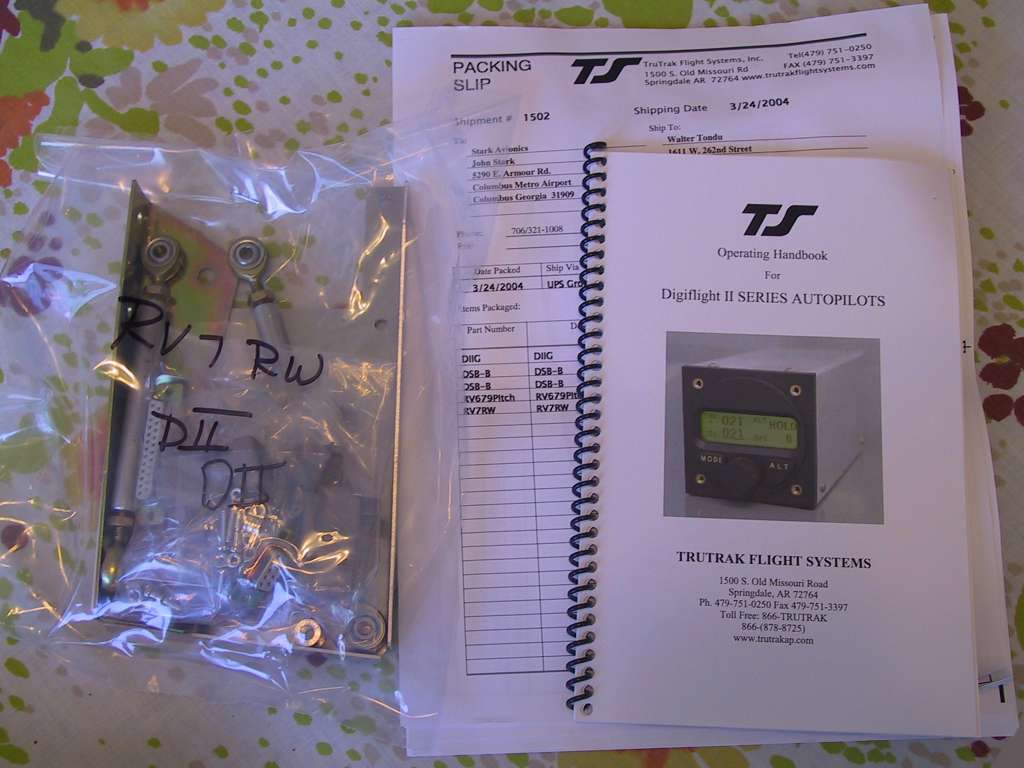
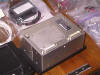
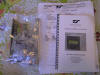
The Trutrak Autopilot arrived today. It's the last
of the 'big' avionics items. The head unit is light as a feather.
The two motors on the other hand are some heavy weight units. It was
packaged very well. Instructions seem a bit bleak though.
    |
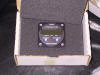
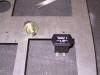
| 4/22/04 |
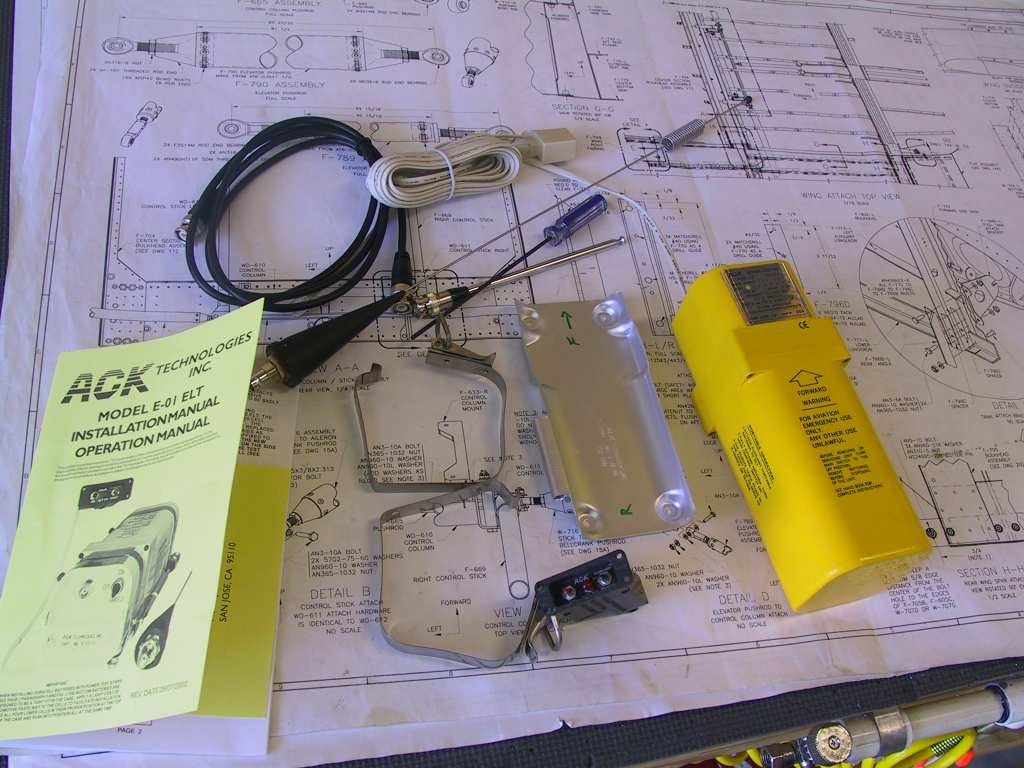
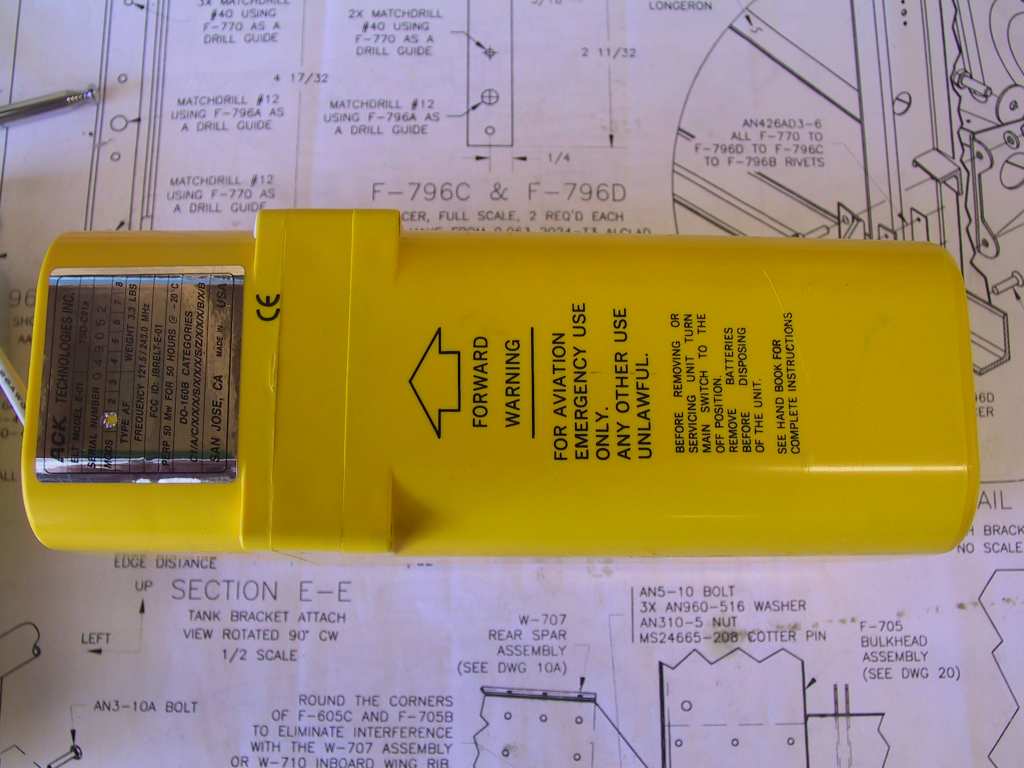
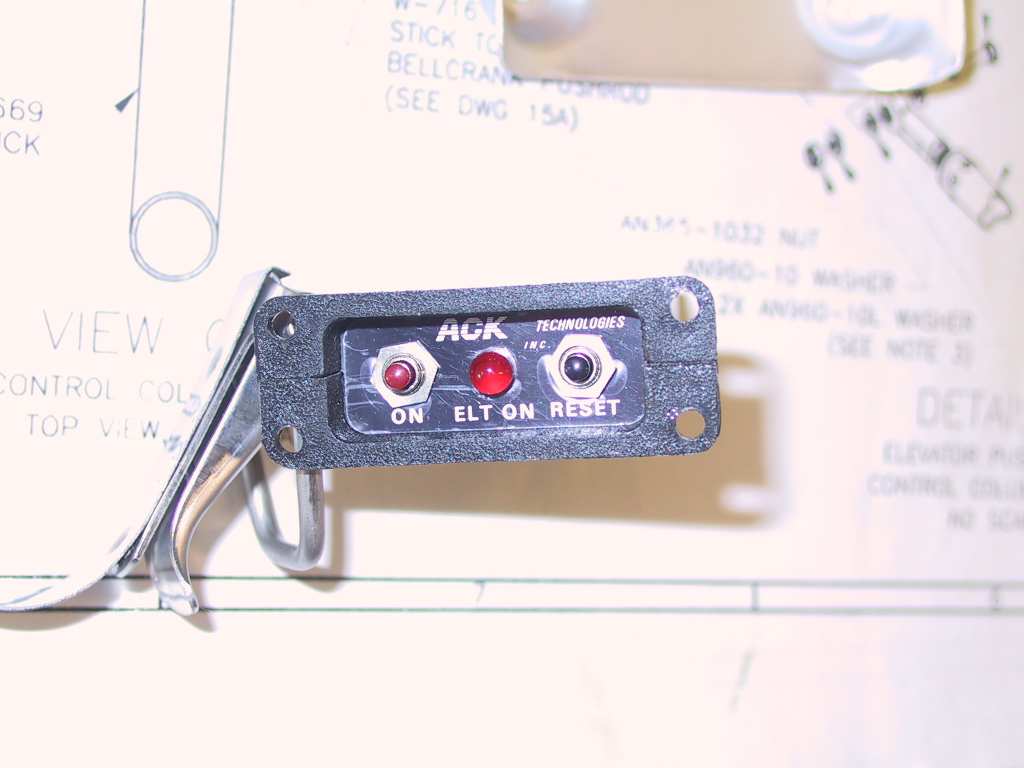
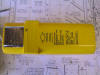
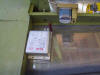
The ELT has arrived. Very Kewl. I'll mount
this when I start to do the wiring in the fuselage. This ACK unit is
nice because it uses throwaway batteries. None of that expensive
Ni-cad crap.
   |
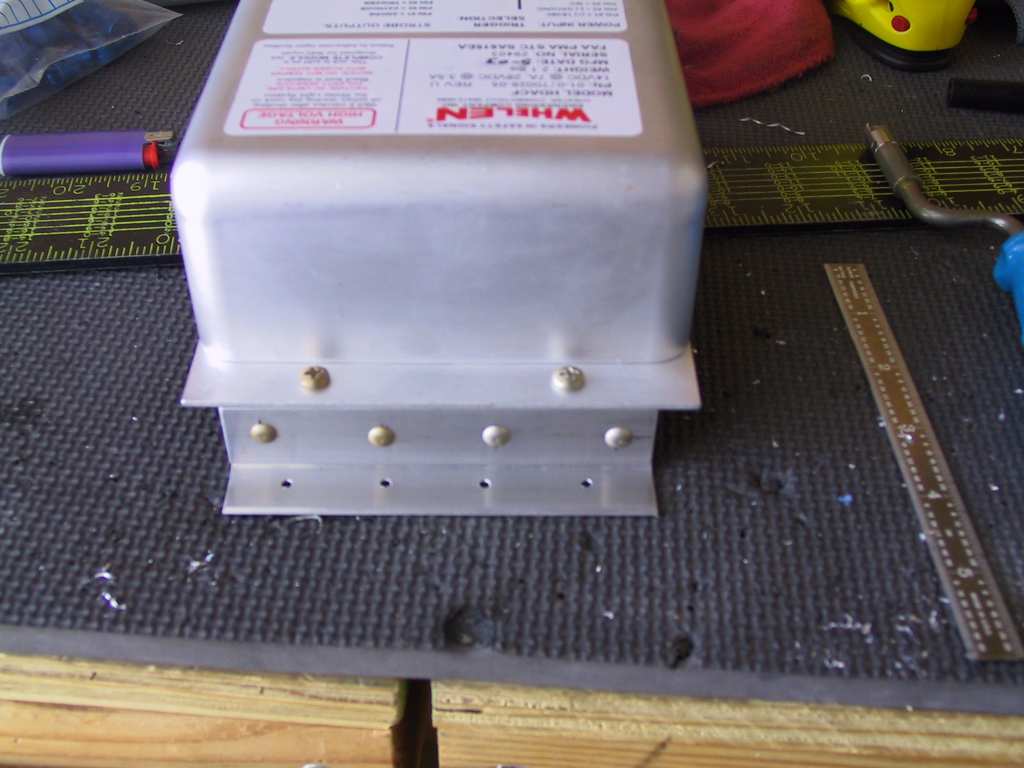
| 5/6/04 |
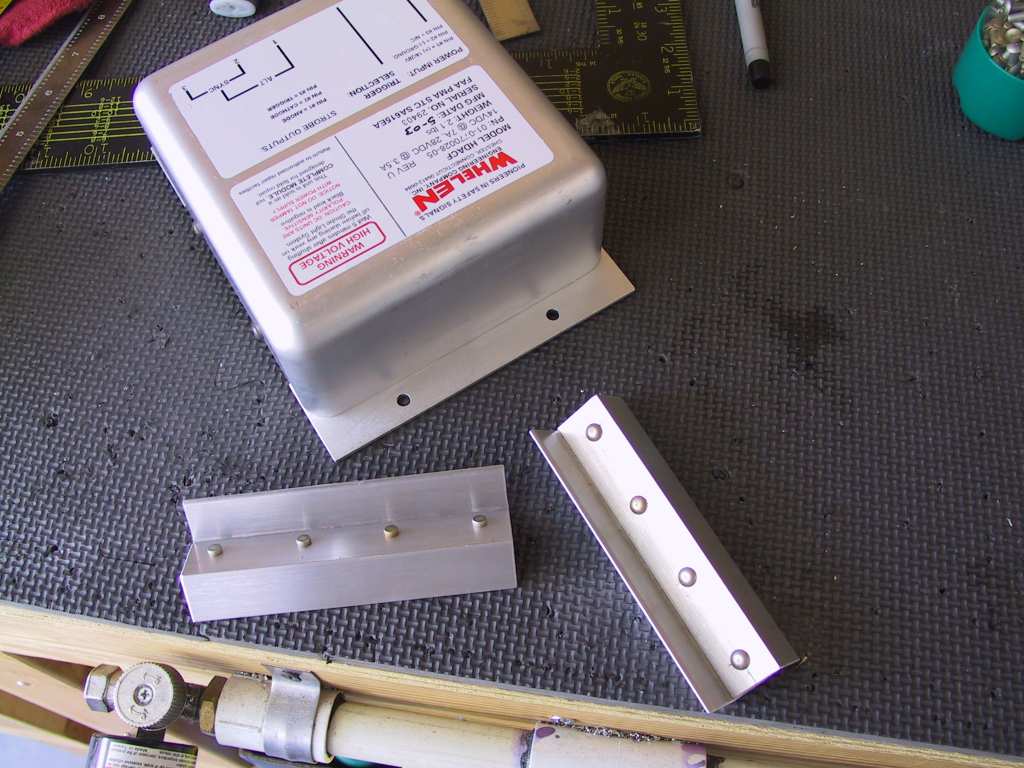
Made a mount for the Whelen system 6 strobes/nav light
power pack. Don't know exactly where I'll mount it yet. I
don't know if it will interfere with the Trutrak AP servo/wiring in the
fuselage. I'll have to ask around before I permanently locate it.
   |
| 5/25/04 |
Well I haven't really done any design work on the panel
lately. But that doesn't mean I haven't been thinking about it.
I'm really really really tempted to get a third display. Bench
testing these units have convinced me that they are worth every single
solitary penny I spent on them. And I want more. I want two
stacked in front of the pilot, top one for primary flight display and
bottom one for the Nav screen. To the right of that is the avionics
stack with the Garmin GNS-430. Having the two nav screens side by
side is awesome. Then to the right of the stack is the lone EFIS
which will display engine data. I'm not sure if I'll put the EIS 400
on the panel or not. Might as well, there's LOTS of real estate when
you go EFIS all the way. Here's the latest rendition. Oh, you
say, "You can't do that! You're building a tip-up canopy, what about
the panel braces?". Hogwash. Cut them puppies off and move
them where the hell you want. Not structural. I may even move
them to the avionics stack bracing will go. Two-fer.
I haven't placed any of the switches or controls on this but you get
the pictures. Nice and clean. Look at all that room for more
electronic do-dads. Building your own plane is the shiznet.
 |
| 6/6/04 |
After sending email back and forth to Fabian Lefler of
Affordable Panels I finally got
what is and will be the final design. It goes to the cutting table
soon. I'm very excited about this layout. Check it out.
 |
| 6/8/04 |
The new panel gets cut this Thursday. I'm also
ordering a Davtron M800 chronometer and AOA pro through Fabian at
Affordable Panels. He's so easy to work with and has some great
ideas for panels. He's cut a few so he ought to know. Had I a
ton of round gauges on the panel I would have cut them myself with a
punch-out tool. But cutting square holes sucks. Plus Fabian is
going to extend the center of the panel to fit the throttle, prop and
mixture. All in a nicely curved smooth transition. Not the
little angle bracket that Vans offers. They both work, just one is more
pleasant to look at. And the panel will be cut from .090 stock.
one word; sturdy. I also decided to go with a built-in CO monitor
next under the hobbs meter on the right. The rectangular cuts on the
far left are the trim indicators and all the round holes are for switches.
No keys on this plane. I'll stick the starter button somewhere. |
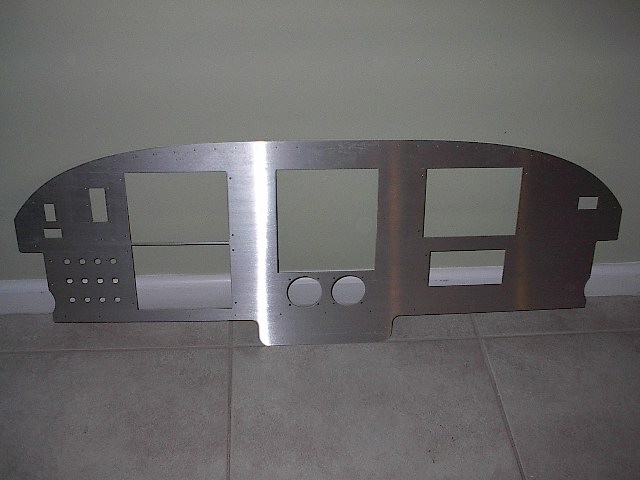
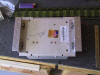
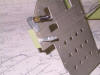
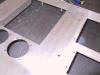
| 6/10/04 |
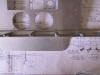
Fabian let me know that the panel was cut. It looks
awesome! Here's a picture that he forward to me. Very very
nice.
  |
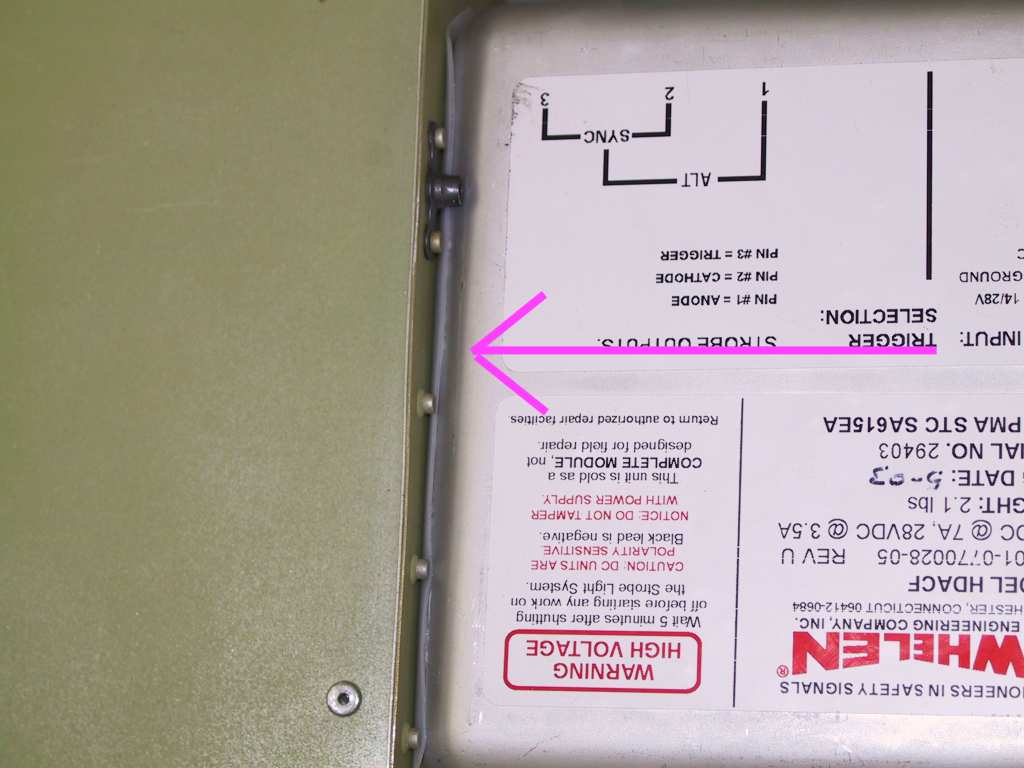
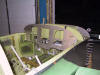
| 6/13/04 |
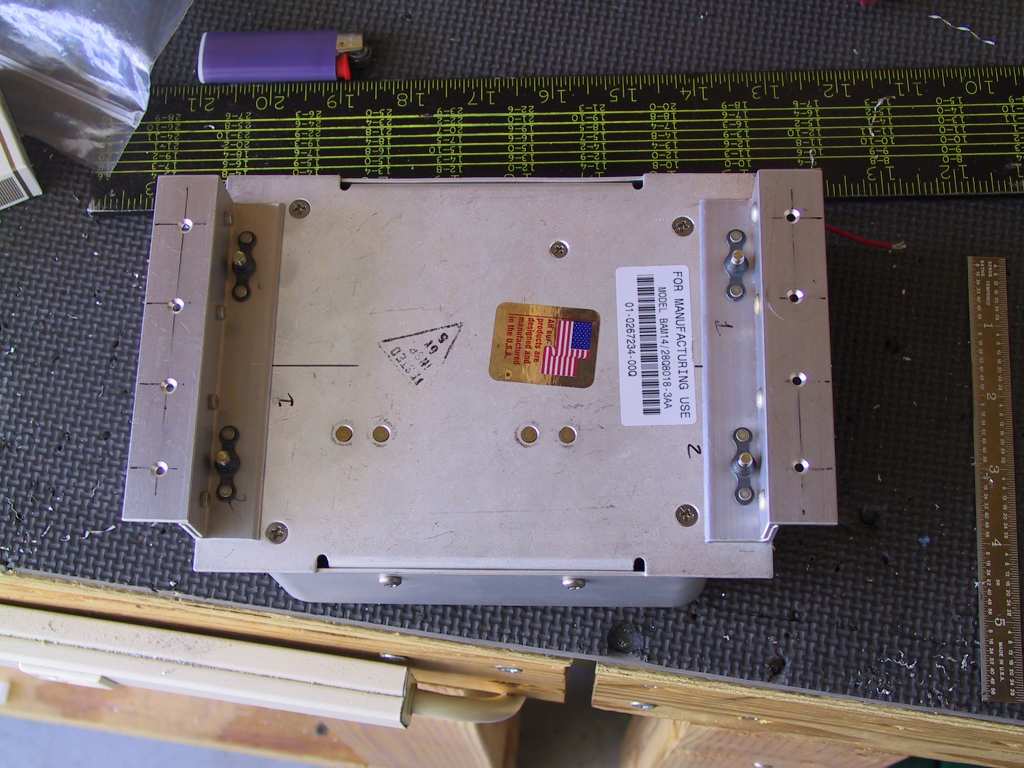
Finally made a decision about where to put the Whelen power
pack. It's just behind the baggage bulkhead, pushed up tight to it.
On the mounts I made it sits just below the nutplates for the baggage
panels. I placed to layers of UHMW tape on the power pack so that it
won't rub on the bulkhead. Drilled it out and mounted it to the floor
with pop rivets. When you don't have a second hand these things work
great. Their on the bottom of the plane. Who's gonna notice?
Arrows point to the pop rivets and where the UHMW tape is placed.
   |
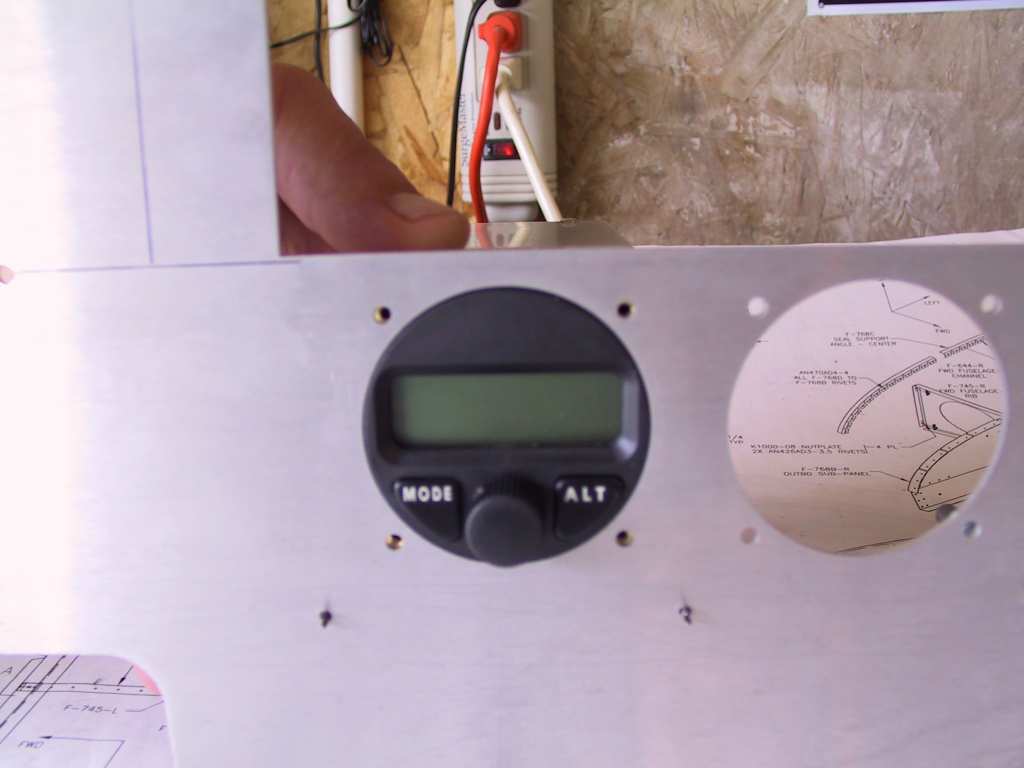
| 6/14/04 |
Today I got my panel from Fabian. It's the first
panel as it's missing one little thing. I told Fabian it was ok but
he insisted he get it perfect. What a guy. First Rate.
This is really more than I had hoped for. I placed it against vans
panel and it lines up perfectly. Awesome. I test fit a few
components just to see and everything fits very well.
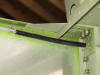
So here's how I'm avoiding that whole mess with the tip up canopy and
the two ribs between the panel and sub panel. I will end up moving
them inward each 3 7/8 inches. They will be between the avionics
stack and the EFIS units. Making sure to leave enough room for some
angle on the sides of the avionics stack for mounting the avionics.
The line indicates the old position. Vans should take note of
this as several builders have done this. They really should make
this a two part rib. But hey, it's easy enough to do yourself.
  |
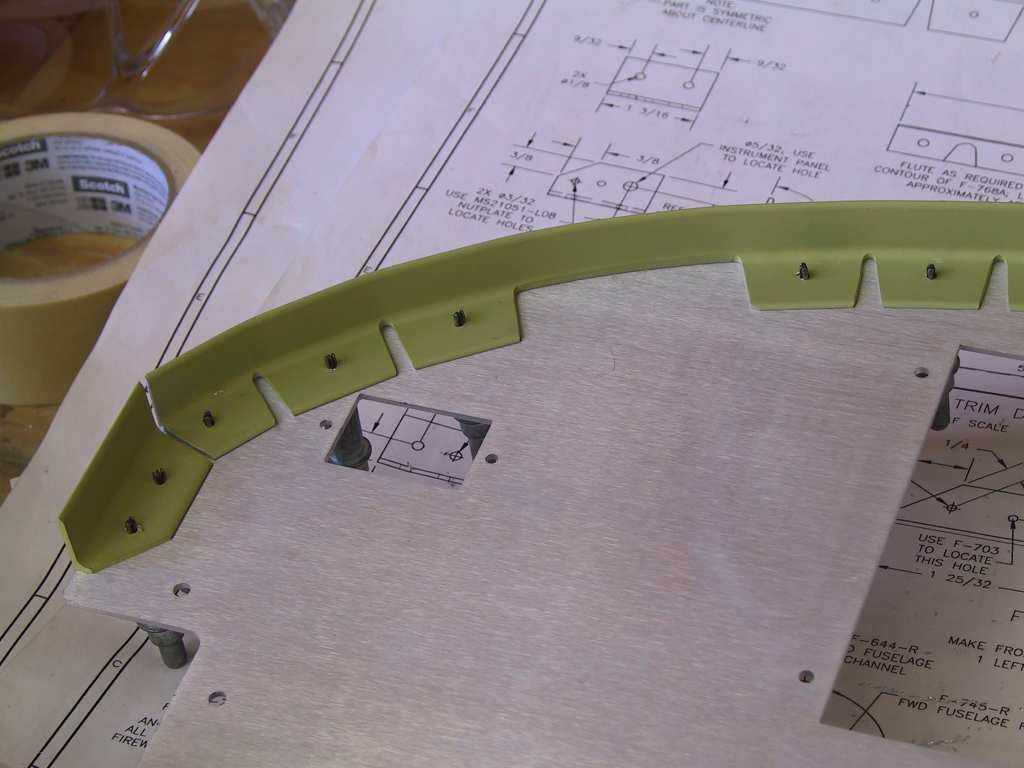
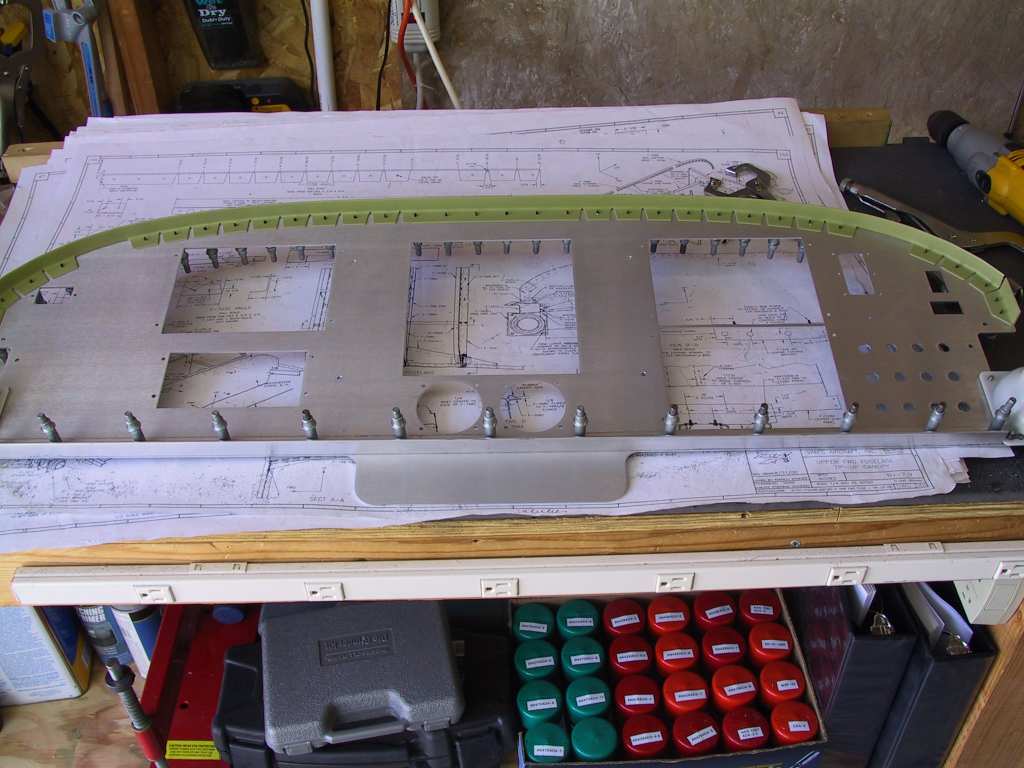
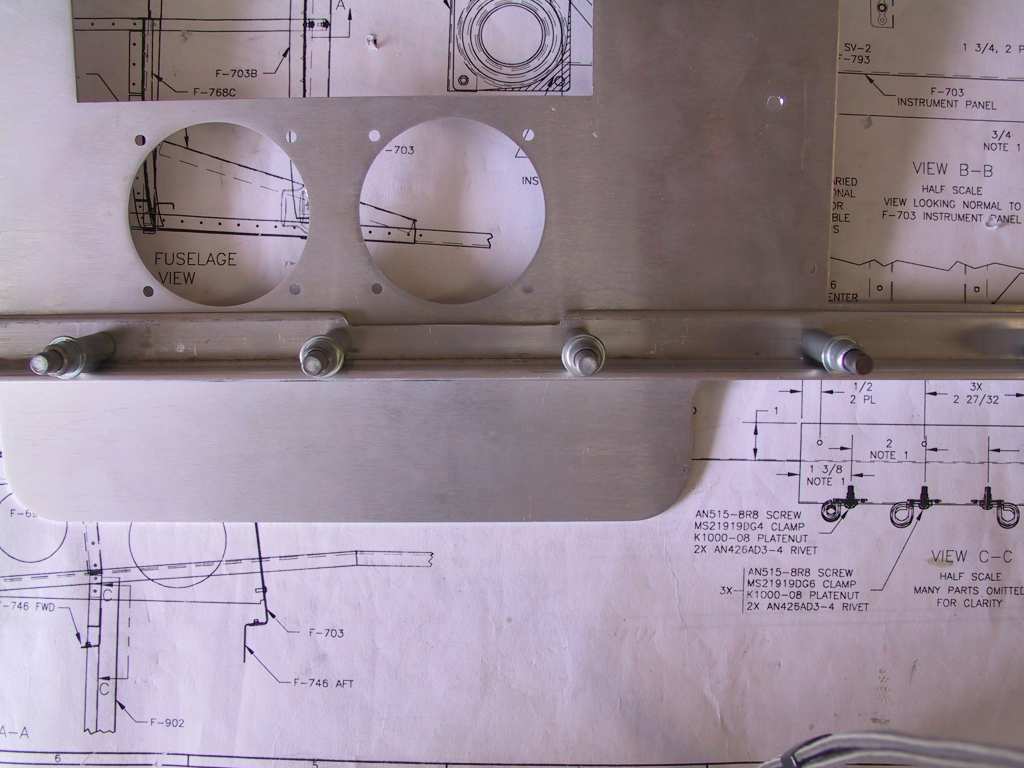
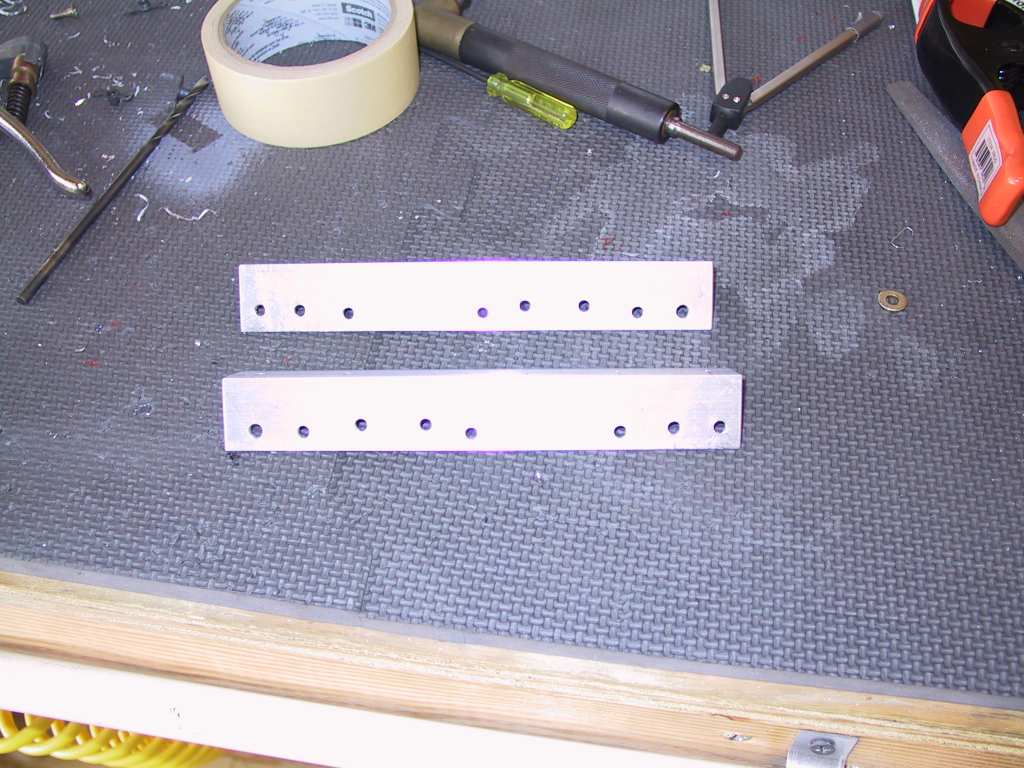
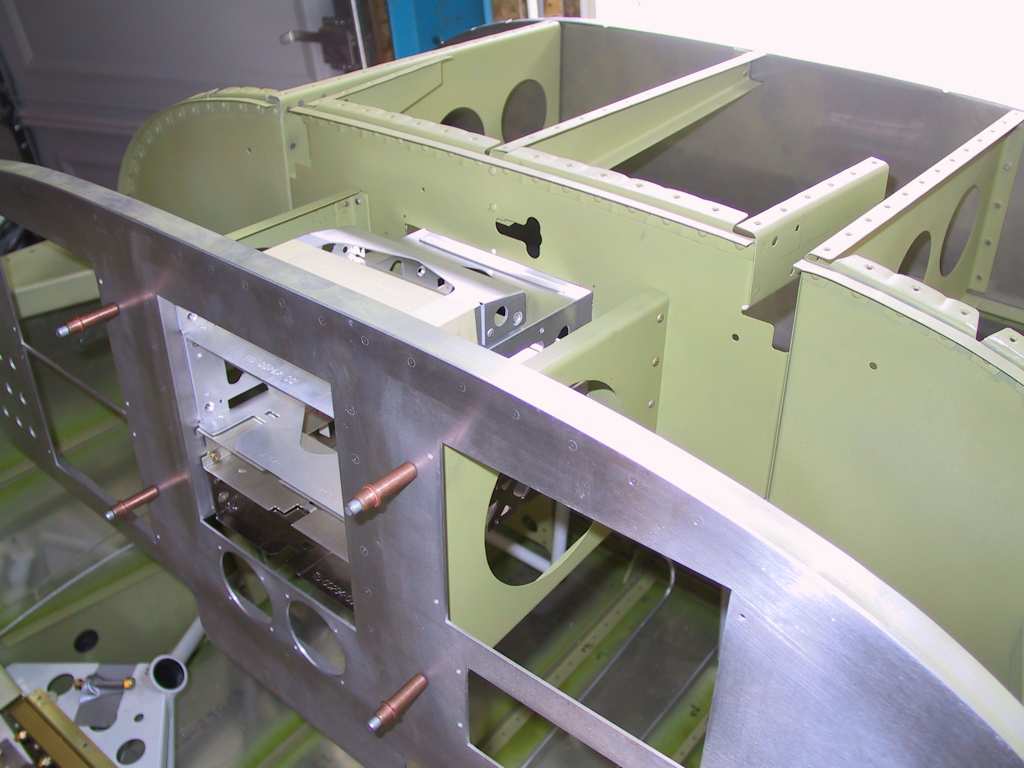
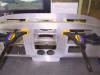
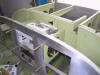
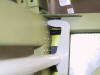
| 6/15/04 |
One of the reasons for moving the sub panel ribs is
ergonomics. The sub panel ribs are placed (according to plans)
exactly where the center of view is for the pilot and co-pilot.
After test fitting the panel in the cockpit it's apparent they Must move.
Since I have a test panel from Fabian (thanks!) I relocated and drilled
the holes where the sub panel rib is attached to the panel. Next I
screwed them on and test fit. Very nice fit. I attached an
angle to the bottom of the panel to make sure the panel was straight.
I'll make this permanent when I get the 'real' panel.

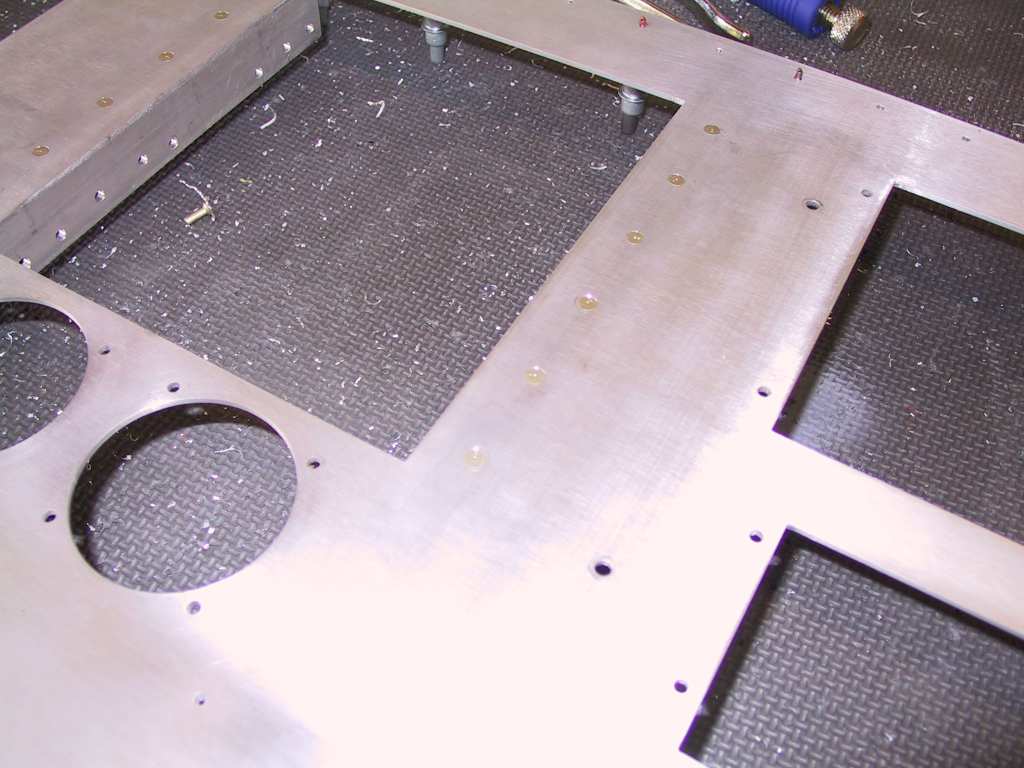
Match drilled the corner angles which hold the panel to the canopy
decks.
Dry run.
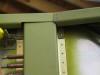
You can see here I drew a line where the break (slight bend) happens in
the sub frame. I took this into consideration when I cut these pieces
a while ago. Just making sure everything lines up. In the
picture there is a slight misalignment. I corrected that before
drilling.
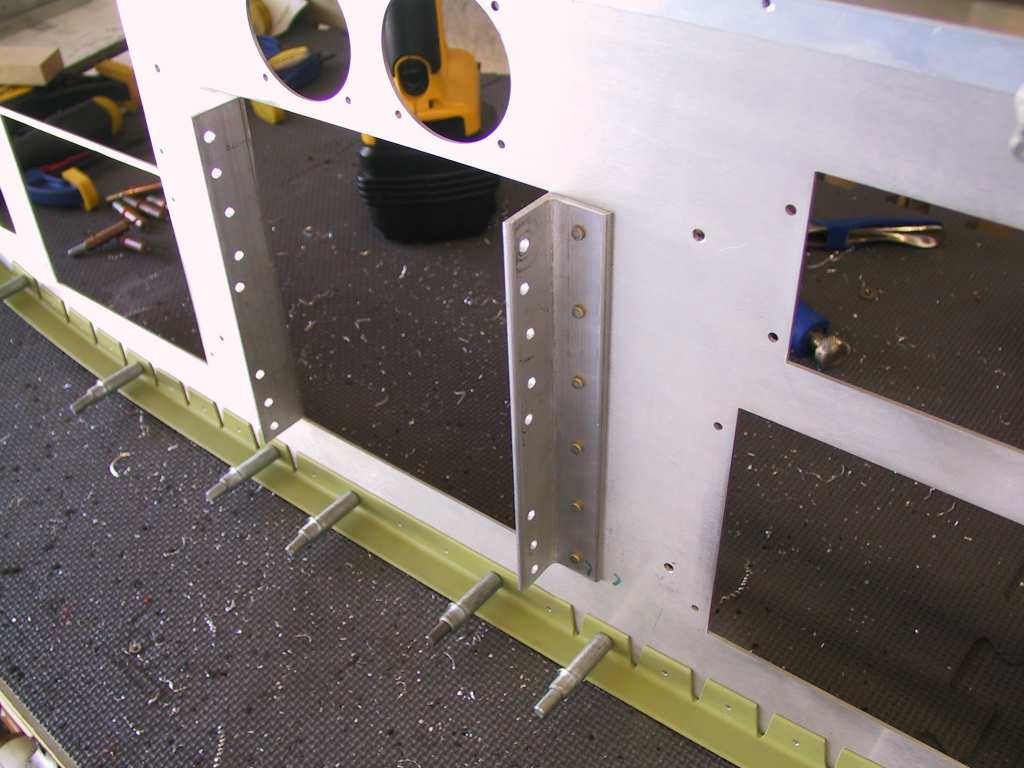
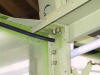
I made sure the distances between each new rib was the same and that
the distance from the outer edge of the rib and the longeron were the
same. I wanted it to be straight so I took the extra time.
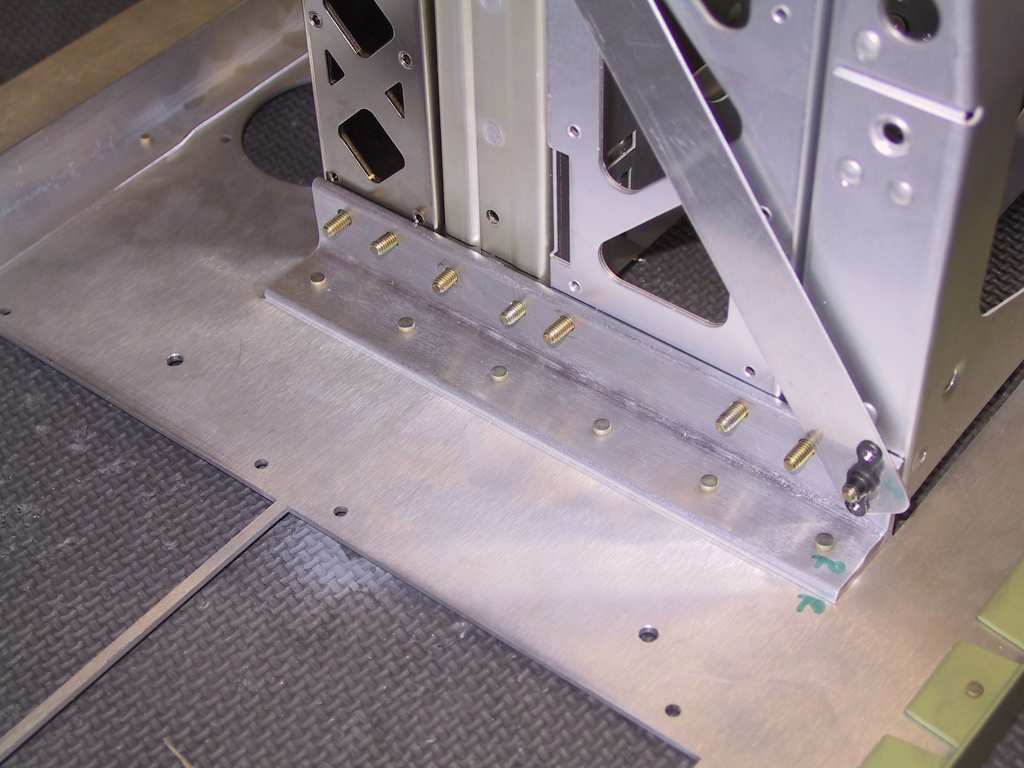
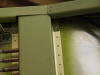
Then I drilled these sucker, #40 at first. One thing you will notice
if you look carefully is that the right and left ribs are swapped.
This means the rib angles face inwards. This will give me a great
place to lay angle across to support the aft portion of the instrument
stack as it comes through this area. Big Bonus!
And now that it's drilled why not take some pics with the canopy frame
installed. Vans, you listening???? You need to make some
changes. This is such a easy, non-structural modification to do.
And now you can make your panel any way you want. Suit yourself.
BTW, there is plenty of room next to the avionics stack for some serious
angle to hold the stack.
 |
| 6/19/04 |
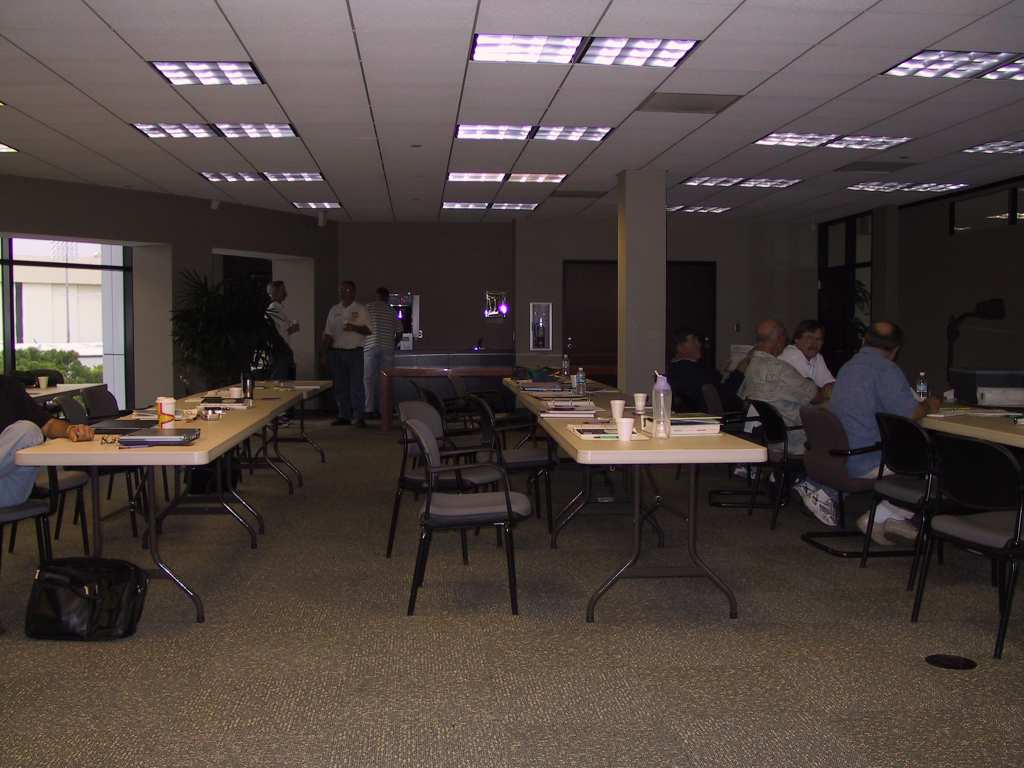
Attended Bob Nuckolls
Aeroelectric seminar in Long
Beach this weekend so not progress on the plane but substantial mental
progress. I think I've finally decided on a single battery, dual
alternator installation. This seminar is well worth the cost.
Bob does a great job of explaining and he's pretty patient with us
rookies.
  |
| 6/20/04 |
Tried to get something done today after the seminar and
before leaving for Mojave. Fit the reinforcing angle to the top of
the panel. Just go slow and continue to clamp all around. I
had to do a little trimming of the lower angle to fit the TruTrak AP.
I'm using 1/8 inch angle here. I think I'll toss this and use
something lighter, as it's overkill and heavy as heck.
Tonight David, his father-in-law and I are heading to Mojave at
midnight
to watch Burt Rutan make history. It's worth not getting any sleep. |
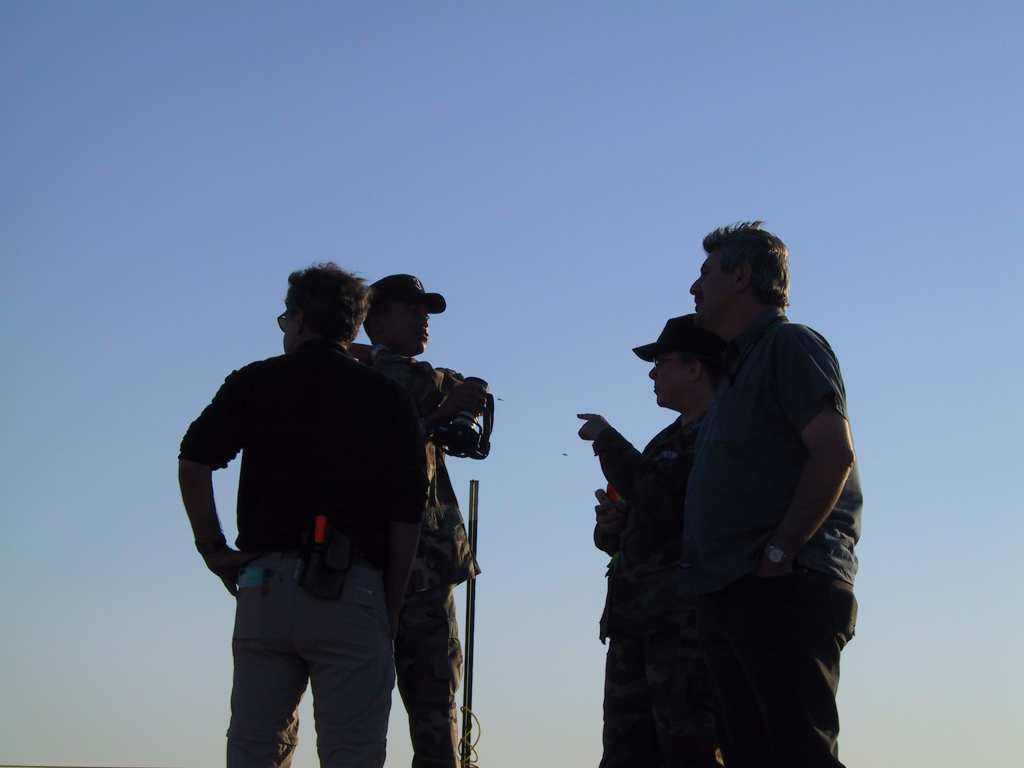
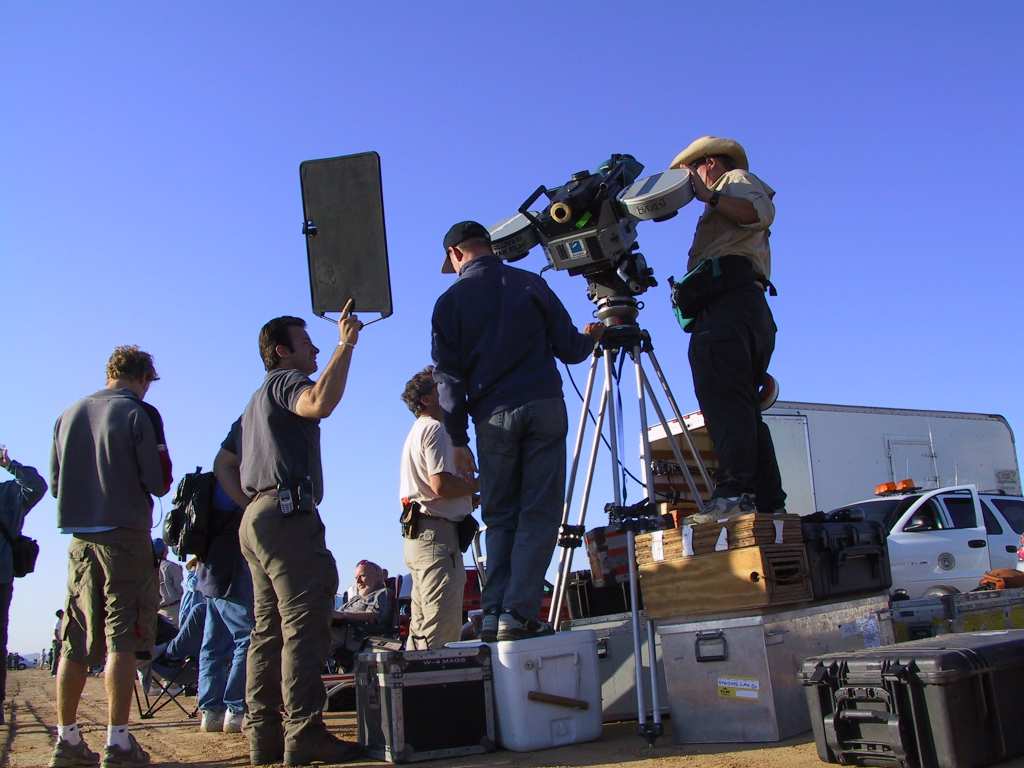
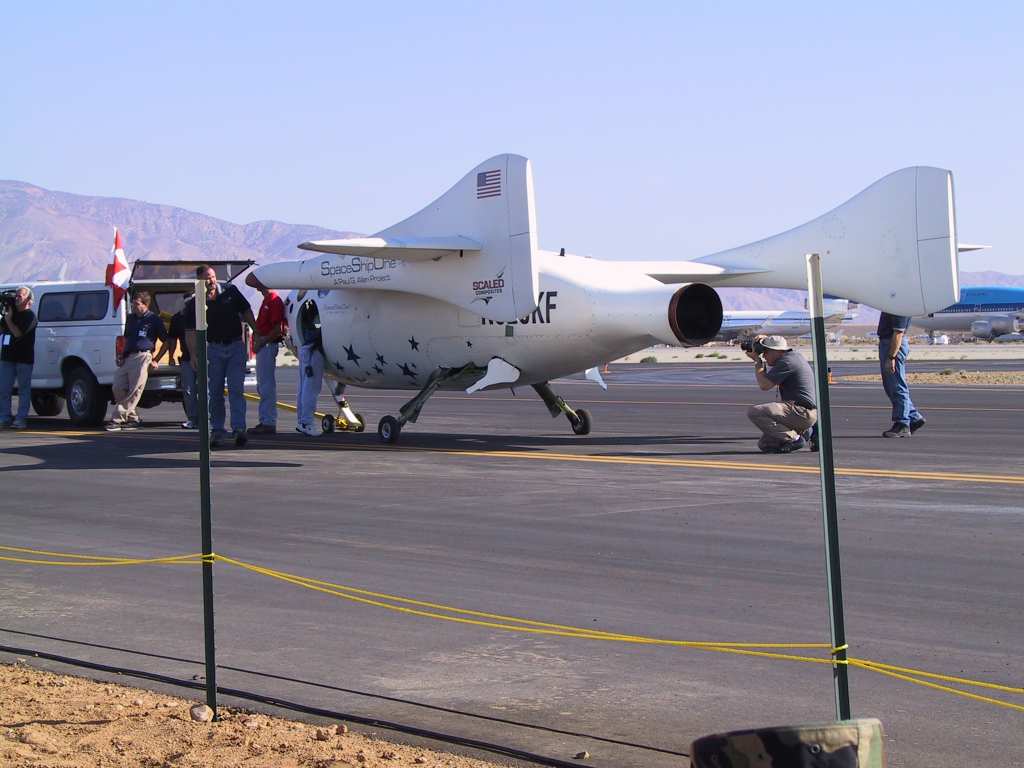
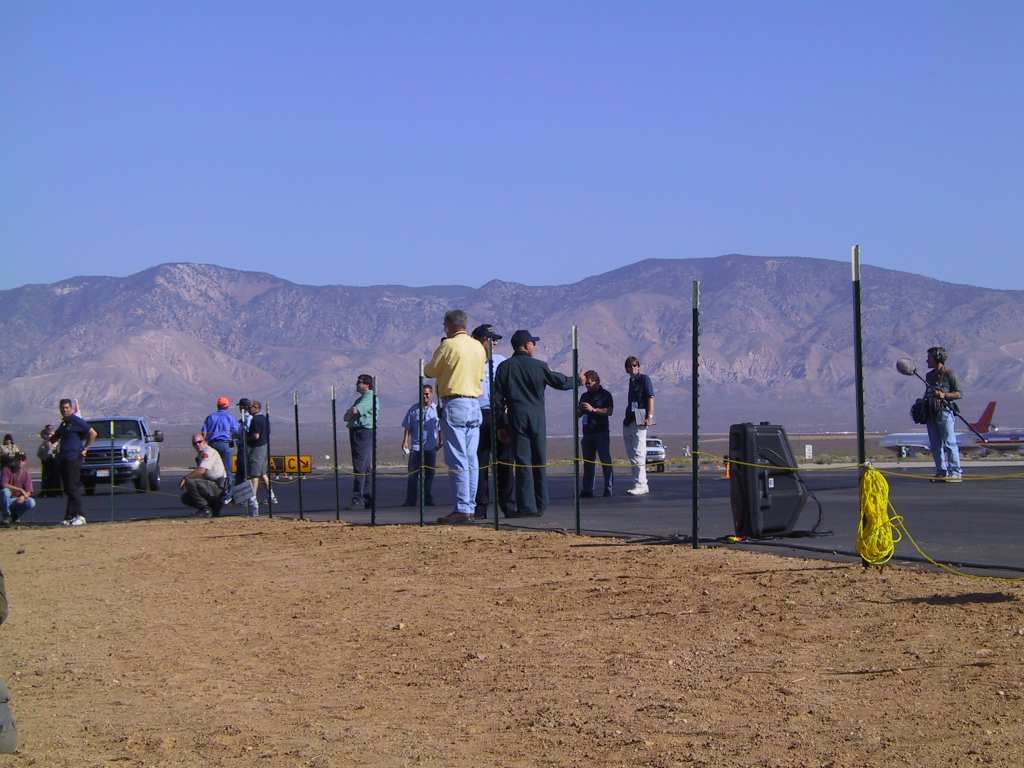
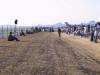
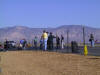
| 6/21/04 |
We arrived at Mojave at 2:30am. David got us into
the press area with his press pass and some persuasion. Very nice
job. Satellite trucks everywhere. The winds were HOWLING at
around 40 mph. I had a really tough time pitching my tent in-between
the car and a fence with that wind. I finally managed but had to
sleep on the side of the tent to keep from getting blown over.
Needless to say, I didn't get much sleep. David woke me a 4am saying
that we needed to get a move on if we were going to get to the press
risers and get a spot. Well it was too late. Another hundred
cars had come in after us. We found another spot just down the
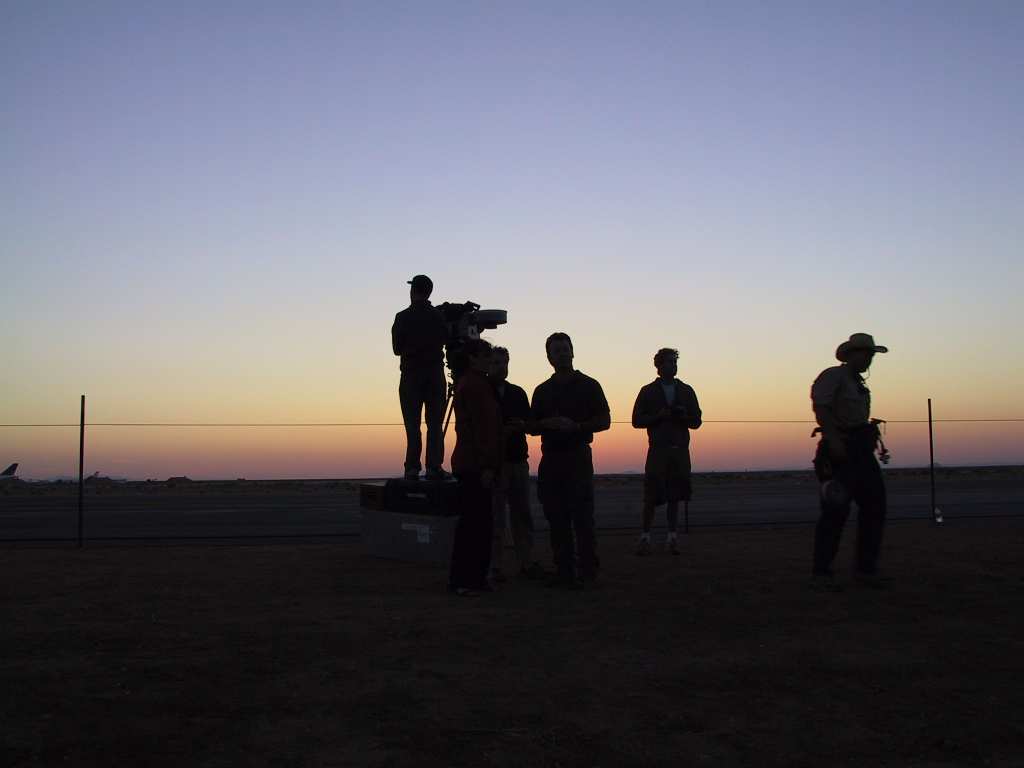
taxiway from the risers. I thought it was a great spot. Dawn
breaks at Mojave. -- You know, this was a bad hair day. On top
of the wind and lack of sleep, the sand gets into every pore.
   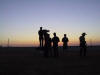
 
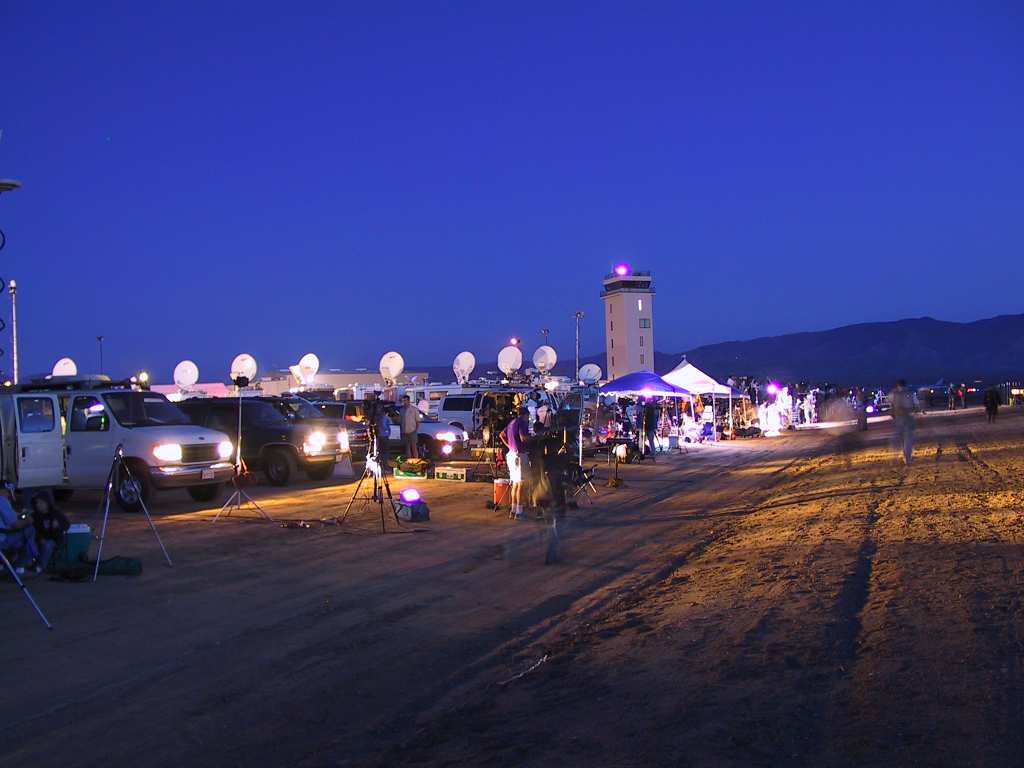
News media getting ready for a big day. Now if only the wind
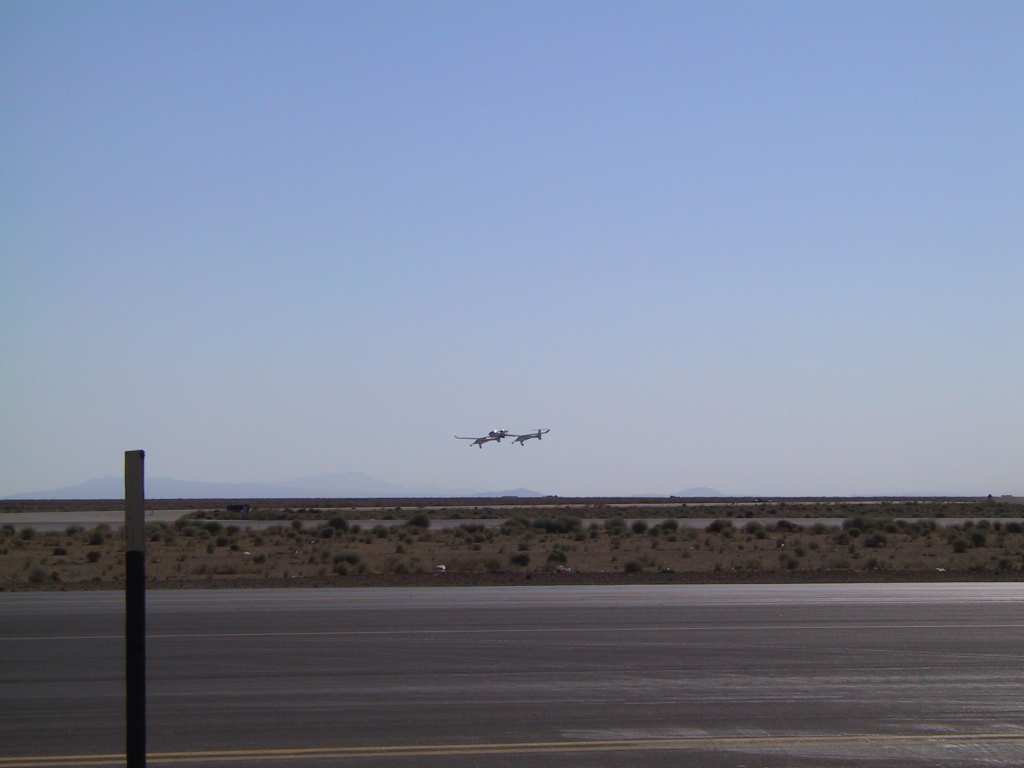
would die down. We were very skeptical that there would be a flight
today because of the sustained winds. But we were told that every
morning it dies down.
Here's my "I was there Picture".

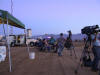
There were a LOT of people there (10,000) and a LOT of press. We
were surrounded. IMAX guys to the right, news to the left.
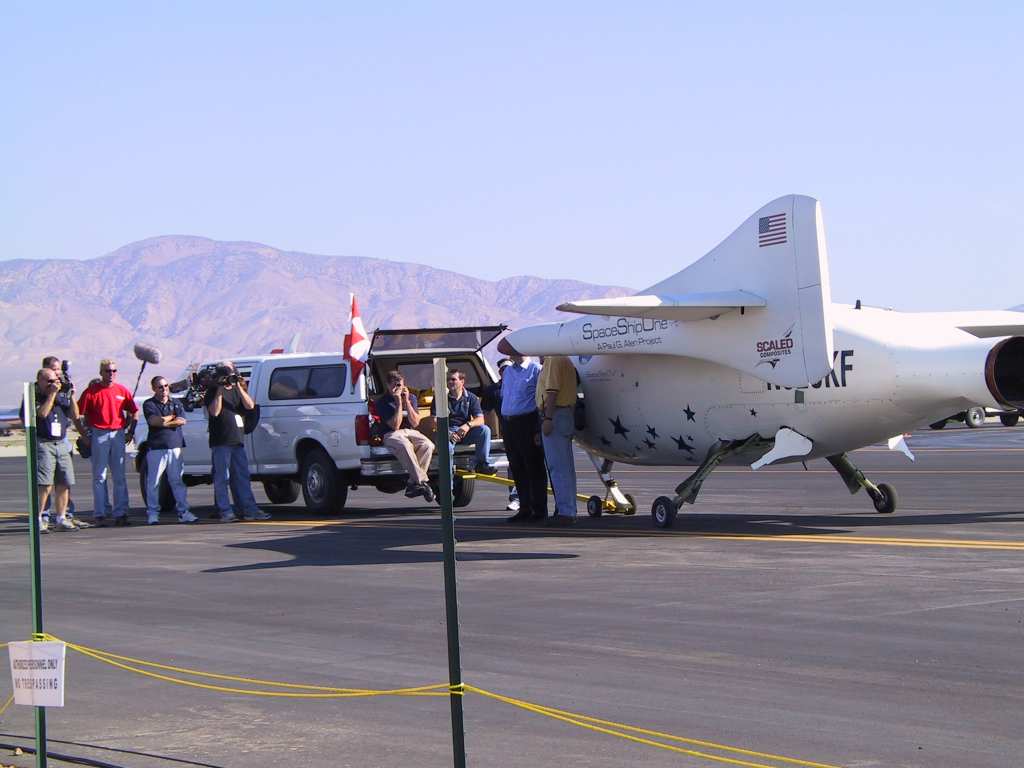
I got some pretty good video of the day. I'll have to get it on
the site but for now here are some stills of the craft after the historic
flight.
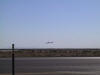 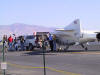 
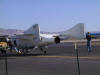 
What a great day.
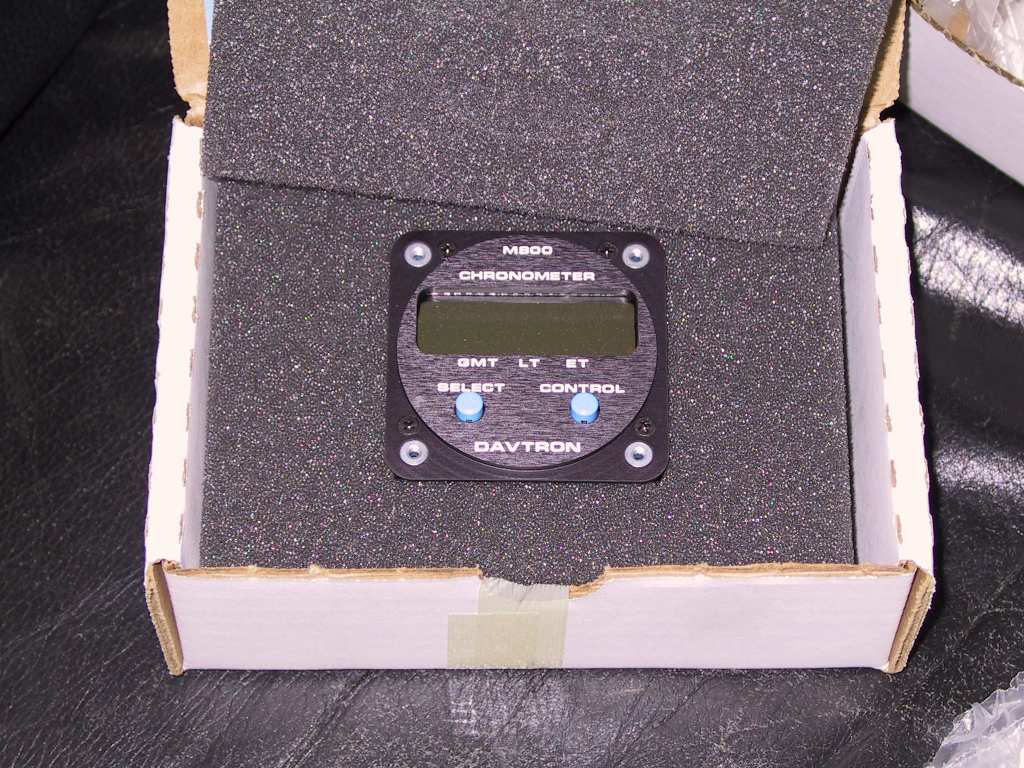
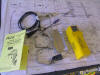
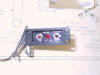
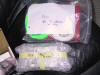
Then when I got home, surprise, more goodies. Here's my AOA Pro,
CO detector and Davtron chronometer (you aren't allowed to call it a
clock).
   |
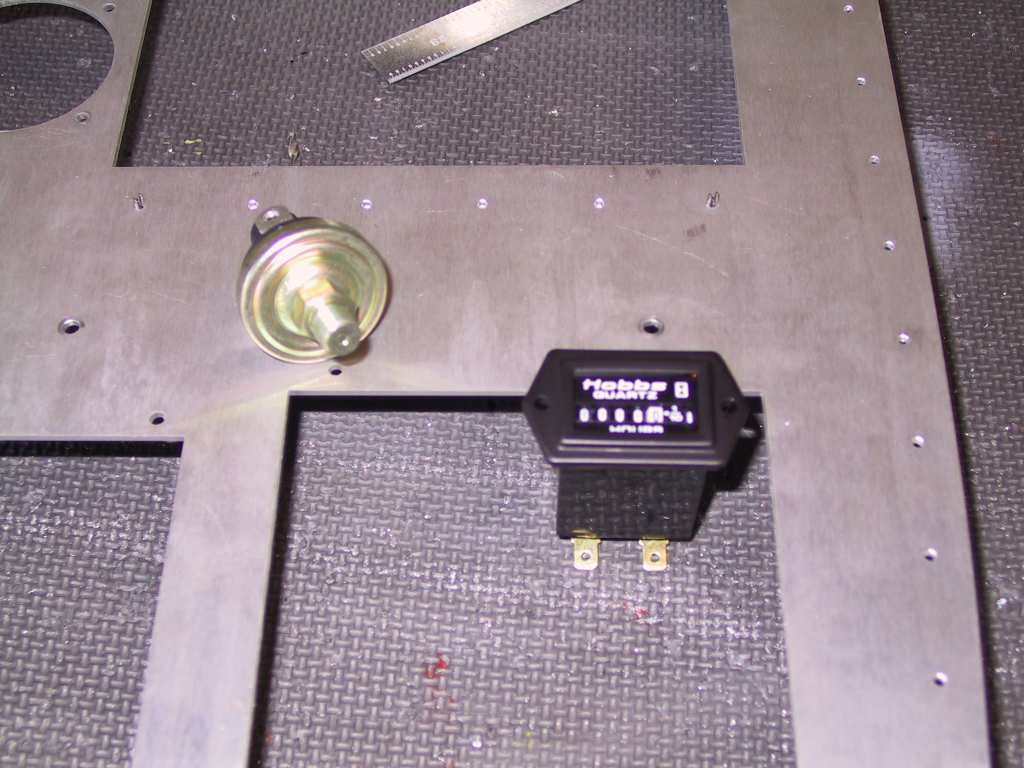
| 7/1/04 |
Haven't been posting very much lately as I've been
spending most of building time thinking about all the little details w/
regards to panel planning, electrical design, interior layout, paint,
schedule and well anything else I can think of. Today I received my
order for a hobbs meter, boring.
 |
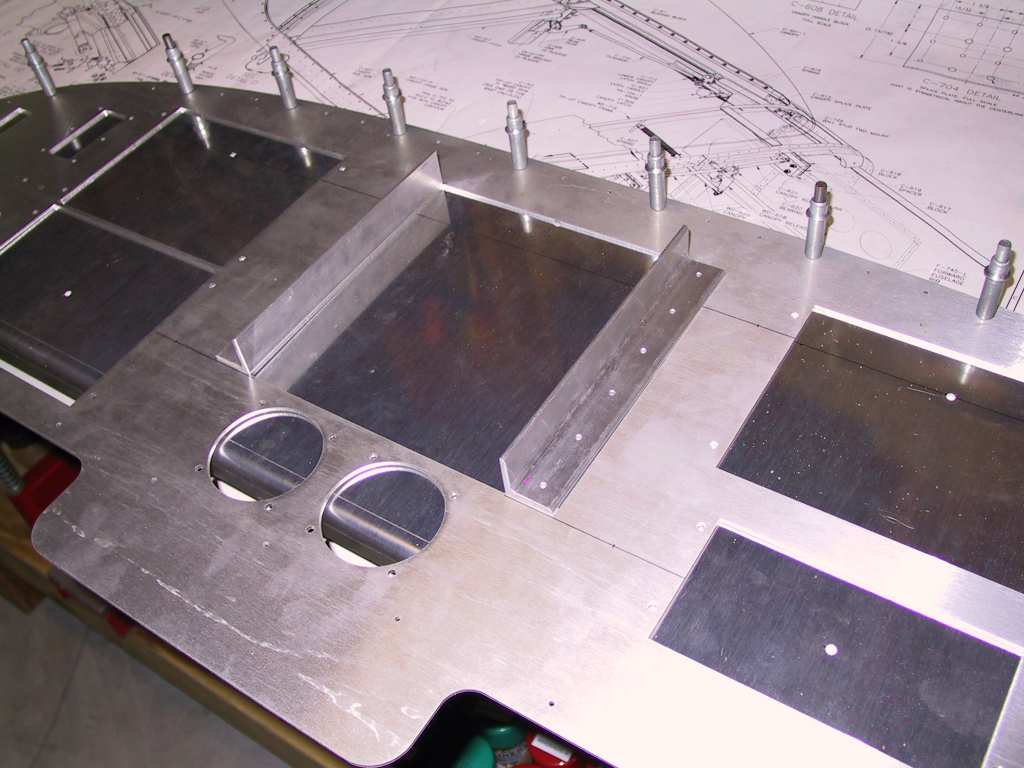
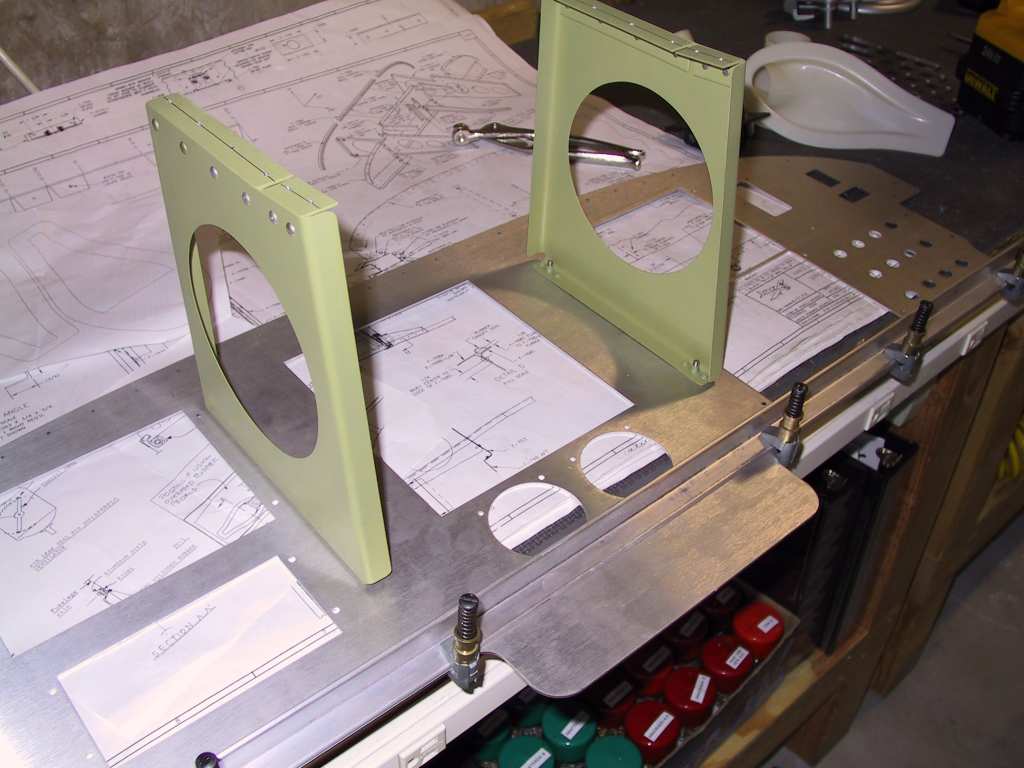
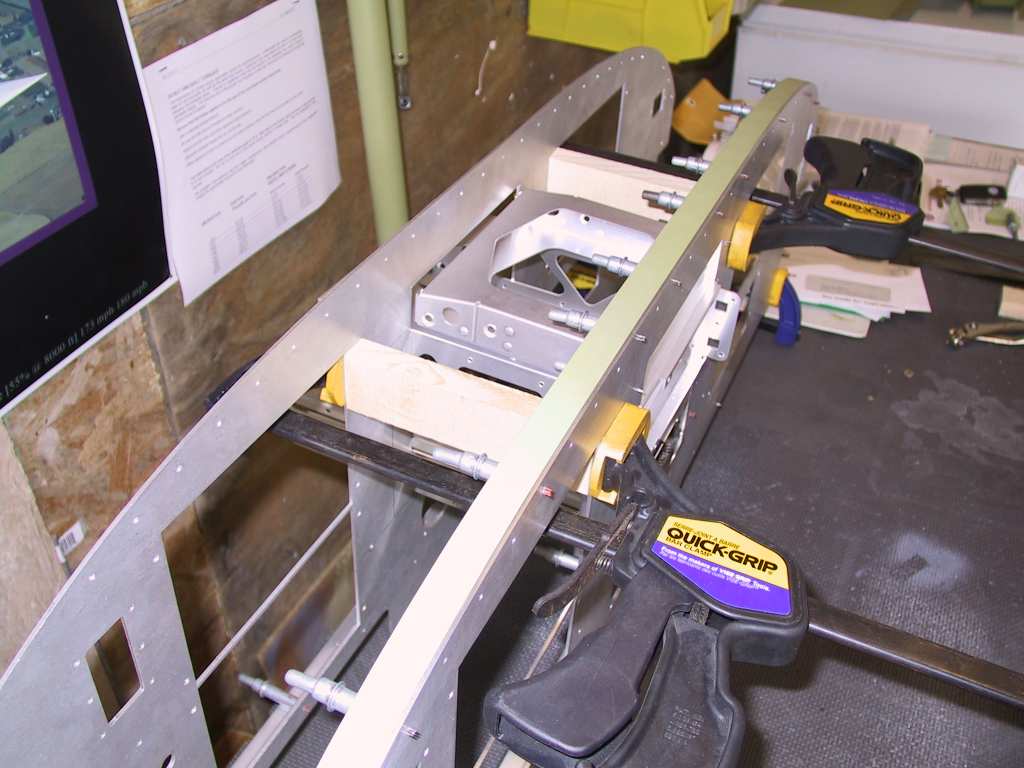
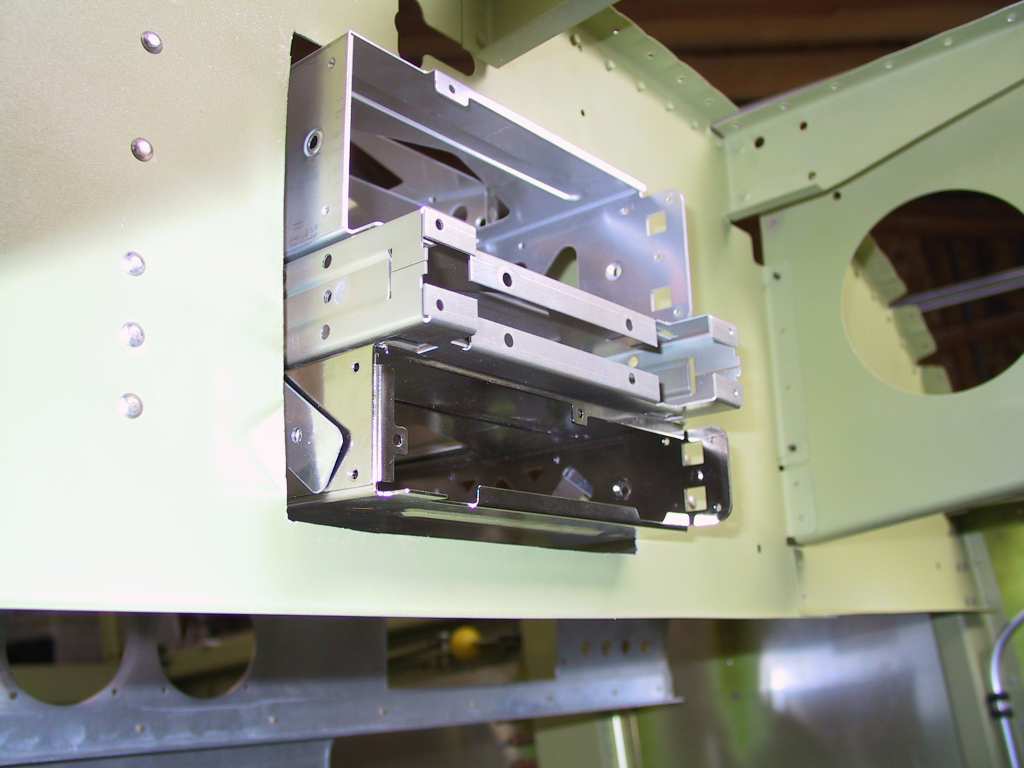
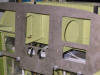
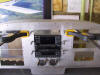
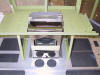
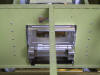
| 7/3/04 |
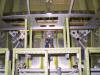
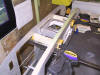
With the long weekend upon me I decided to get the
avionics stack shelves installed. I'm really luck because I have two
identical panels. I simply cut some wood spacers (6 inches) and
spaced the identical panels apart. This left me with a nice shelf
that would keep the radio mounting boxes aligned both horizontally and
vertically. Perfectly square. This made getting the alignment
of all of the perfect. I decided to go with a 3/10
inch overhang
for all instruments from the face of the panel as this is almost exactly
what the GRT EFIS units will stick forward. Symmetry.
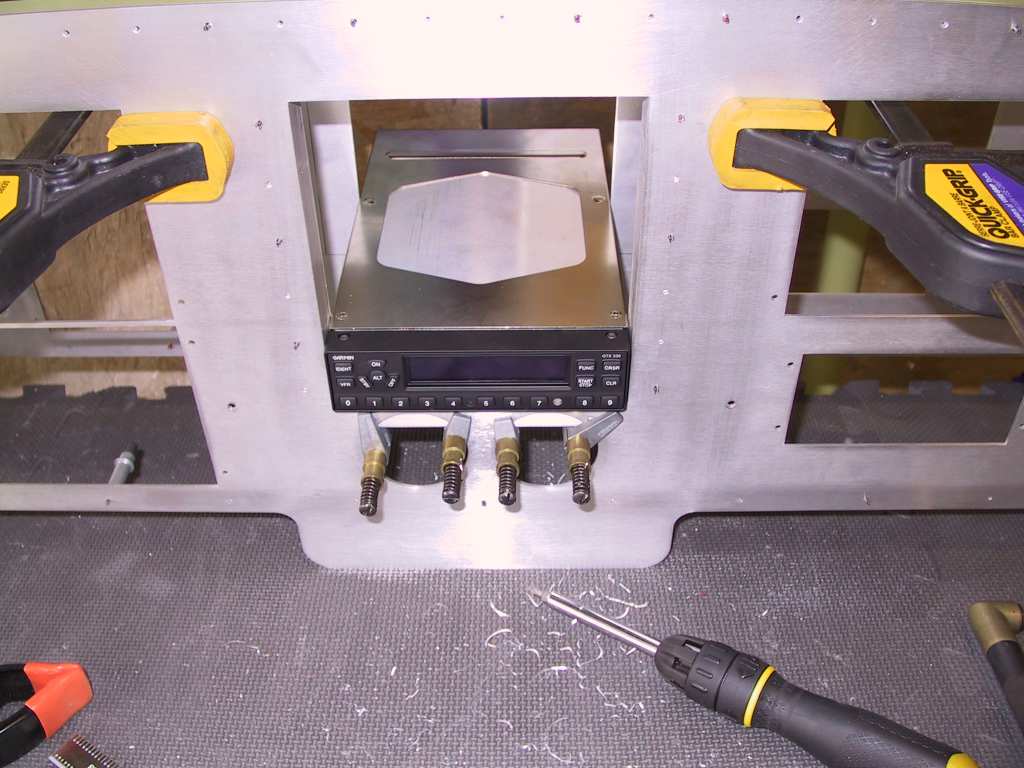
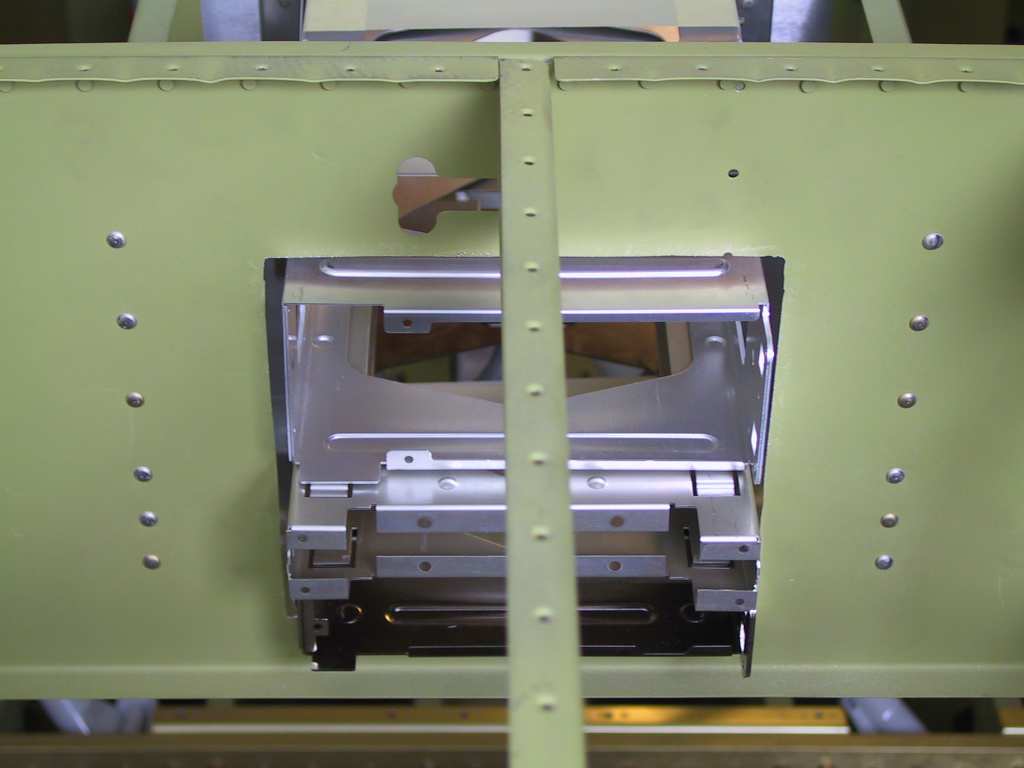
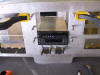
I stuck all the mounting trays in with the instruments in place and
made sure the alignment was perfect. One thing to note is that the
bottom tray does not rest on the edge of the forward most (real) panel so
I used some angle to create a bottom brace. Once I was satisfied
with the alignment I pulled all the avionics out but the bottom unit.
I had the sides of the tray marked with a sharpie line to note how far in
it should be. You have to remove the avionics in order to drill the
holes and when you remove the avionics the tray always moves. For
the first one I lightly clamped it into place.
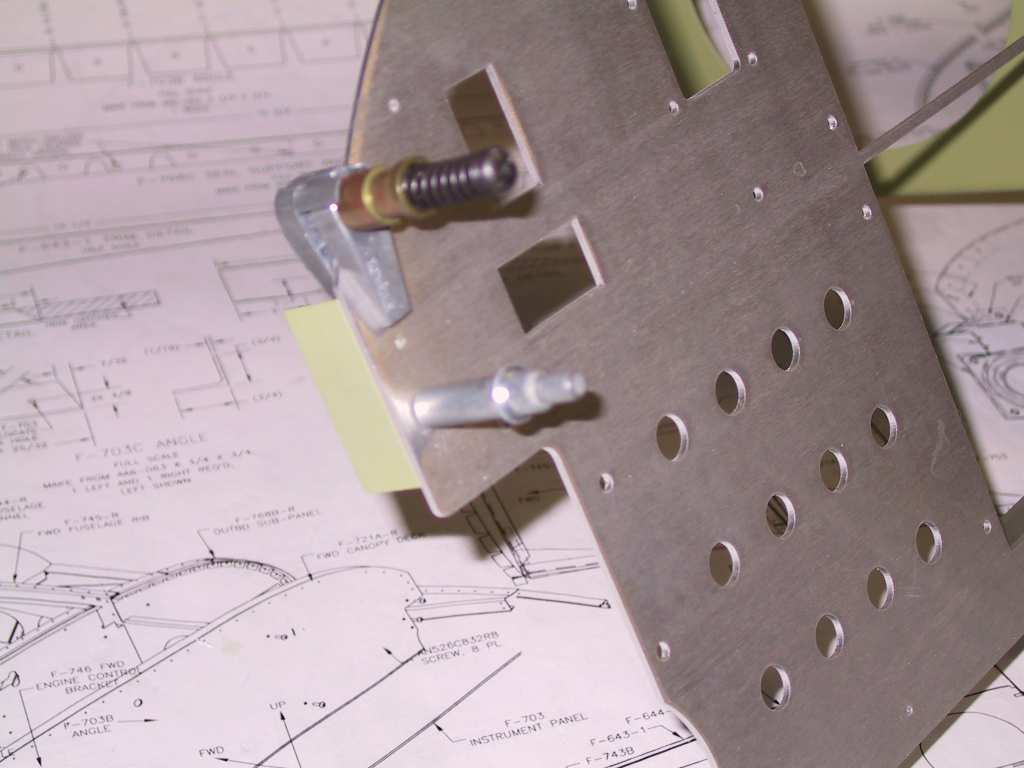
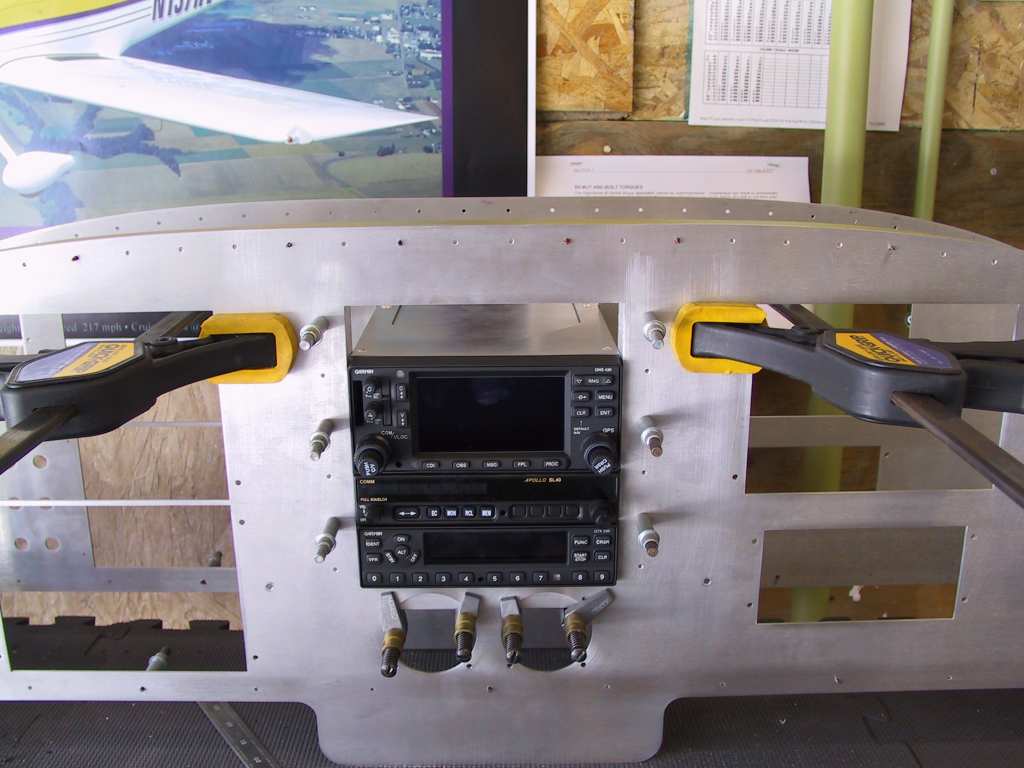
Drilling the holes was no easy feat too. It turns out that even a
small angle drill doesn't provide enough clearance. I marked each
hole by scribing with a sharp 90 angle pick. Next I very very
carefully drilled the hole, starting with a sharp punch and smallest drill
bit I had. Once it is centered the rest is easy.
You end up putting in and taking out each piece of avionics about a
hundred times. I was only marking one hole on each side, drill it
out, replacing everything back in the stack to check for fit, removing
everything but the one I was drilling, mark the next hole on the opposite
side and do it all over again.
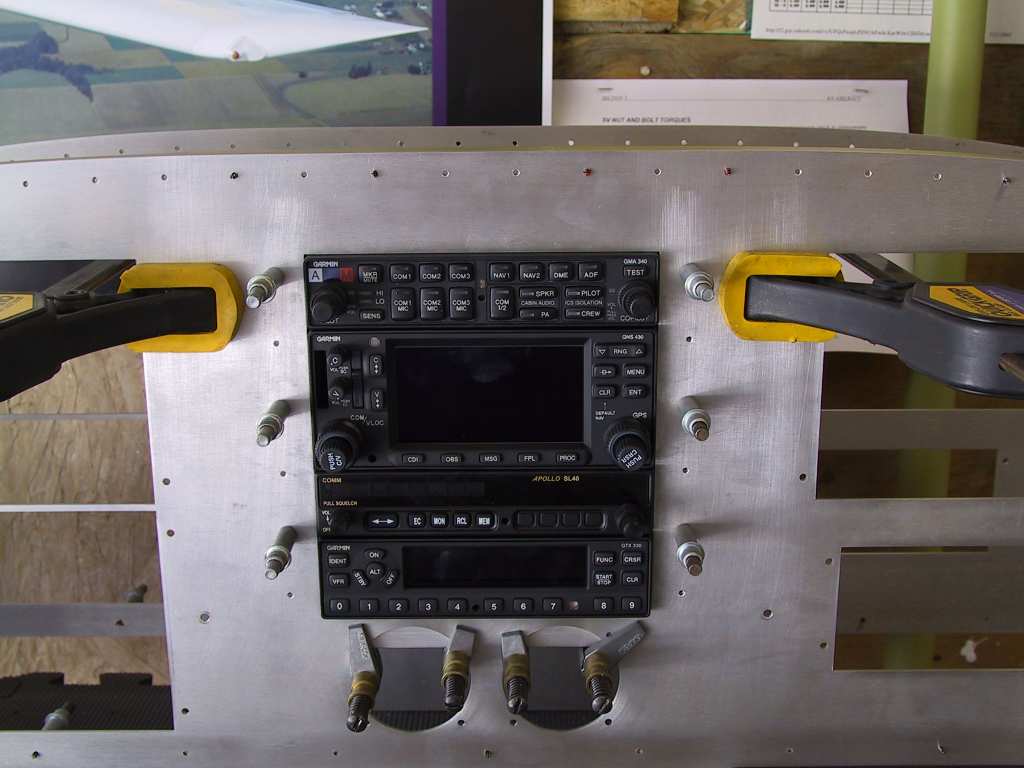
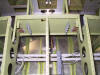
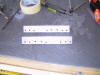
Here's the Swiss cheese angle support for the stack after all the
drilling was done. As you can see, even though all but one of these
are Garmin products, the holes in the trays varies widely.
Next rivet the angles to the panel, being very careful to make the
rivets as perfect and flush as possible.
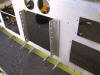 
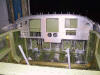
Next it was time to make a single support strap for each side from the
top of the angle to the lowest instrument. And some final shots.
    |
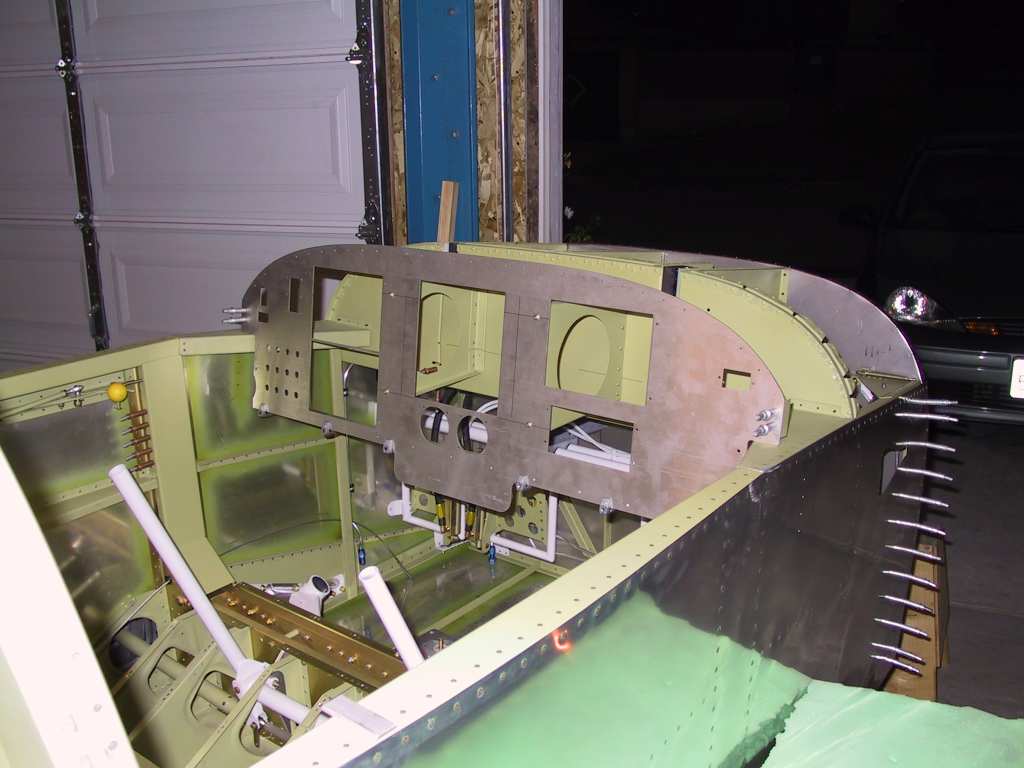
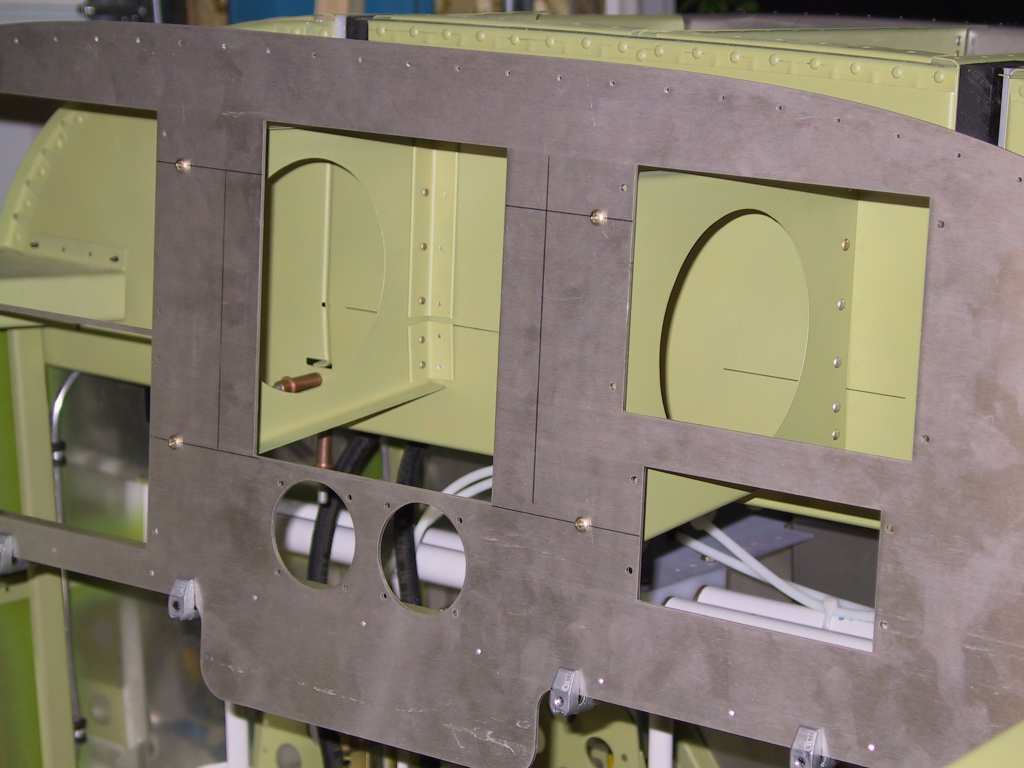
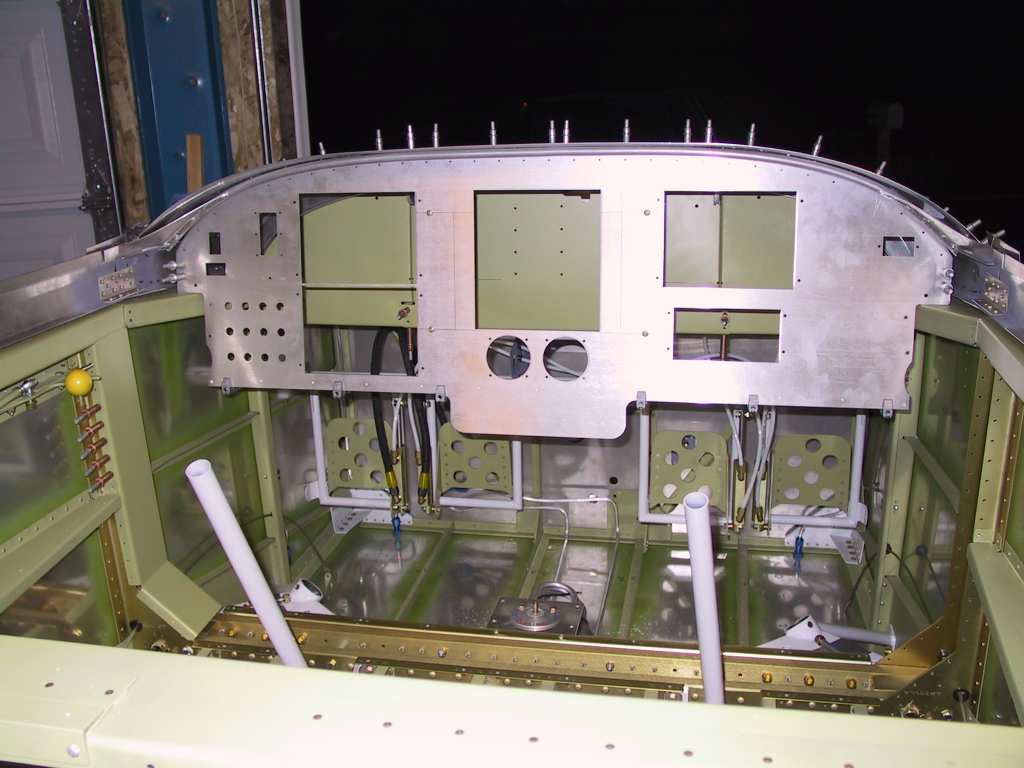
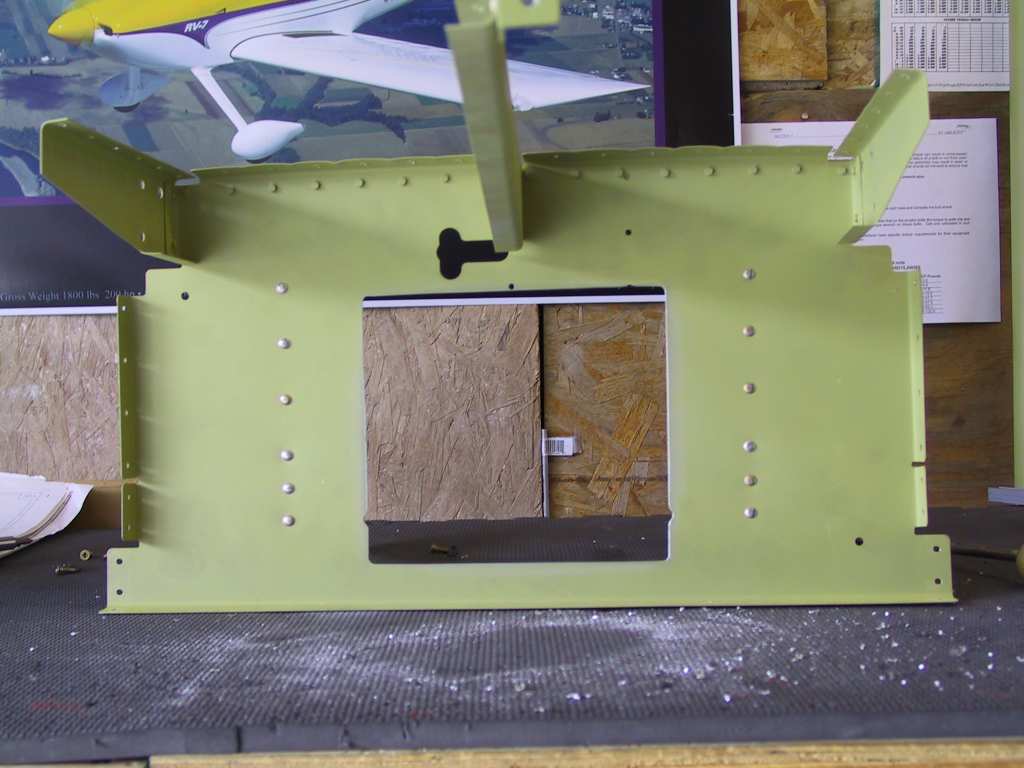
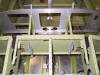
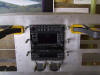
| 7/4/04 |
Time to cut the sub panel to allow the radio stack to fit.
I placed the instrument panel in the approximate place it will be.
Of course it's about 4 inches back from where it needs to be because of
the sub panel. I took a sharpie and traced where the cutout needs to
be roughly, allowing at least 1/4 inch around as a gap. Then cut the
hole with a pneumatic nibbler. Tested the fit and did final filing
and deburring. This was actually easier than I had expected.
Just remember to not rivet the center section of the forward fuselage
section into place or you'll have to do this from inside the cabin or at a
minimum leaning over the side.
  |
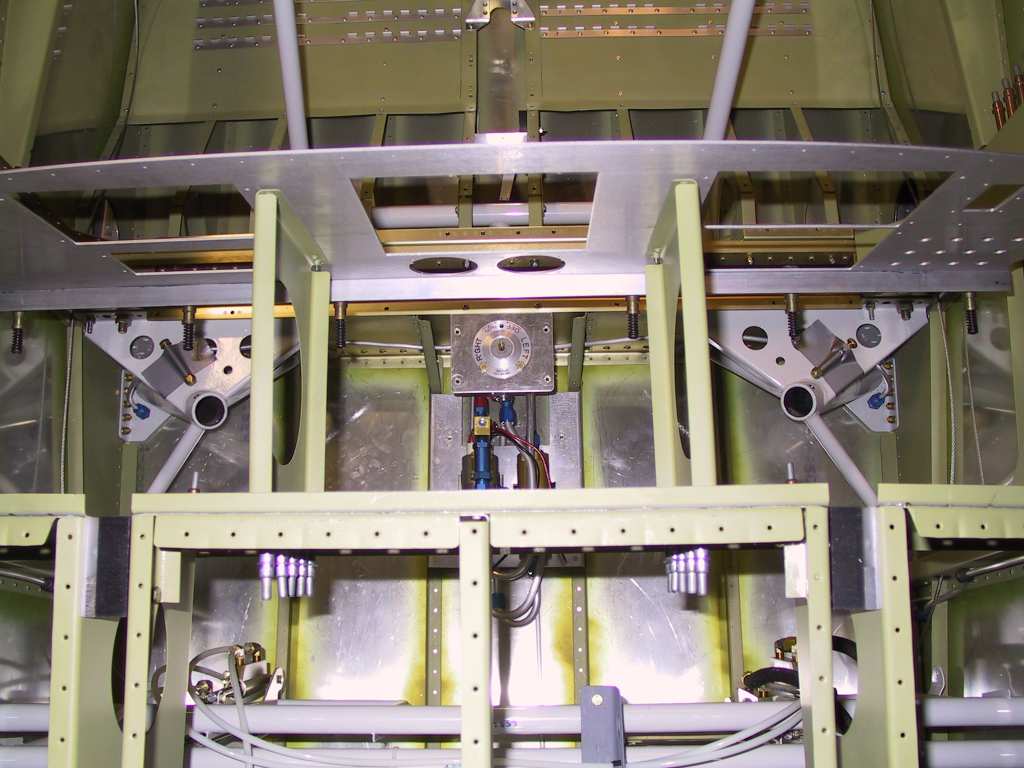
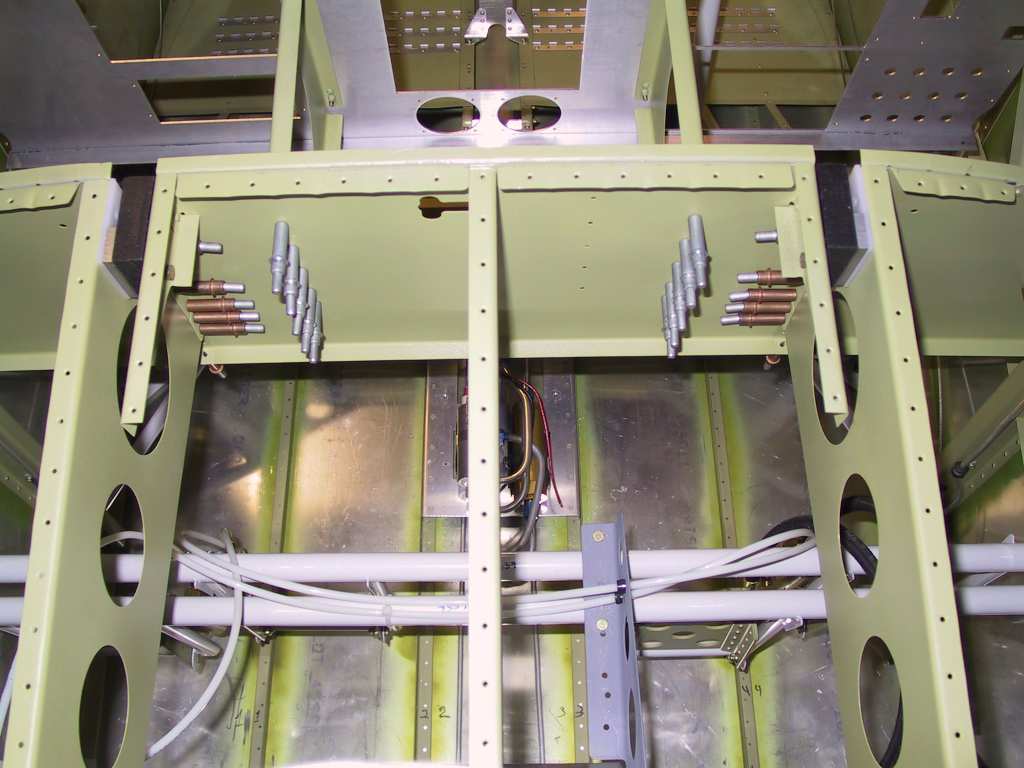
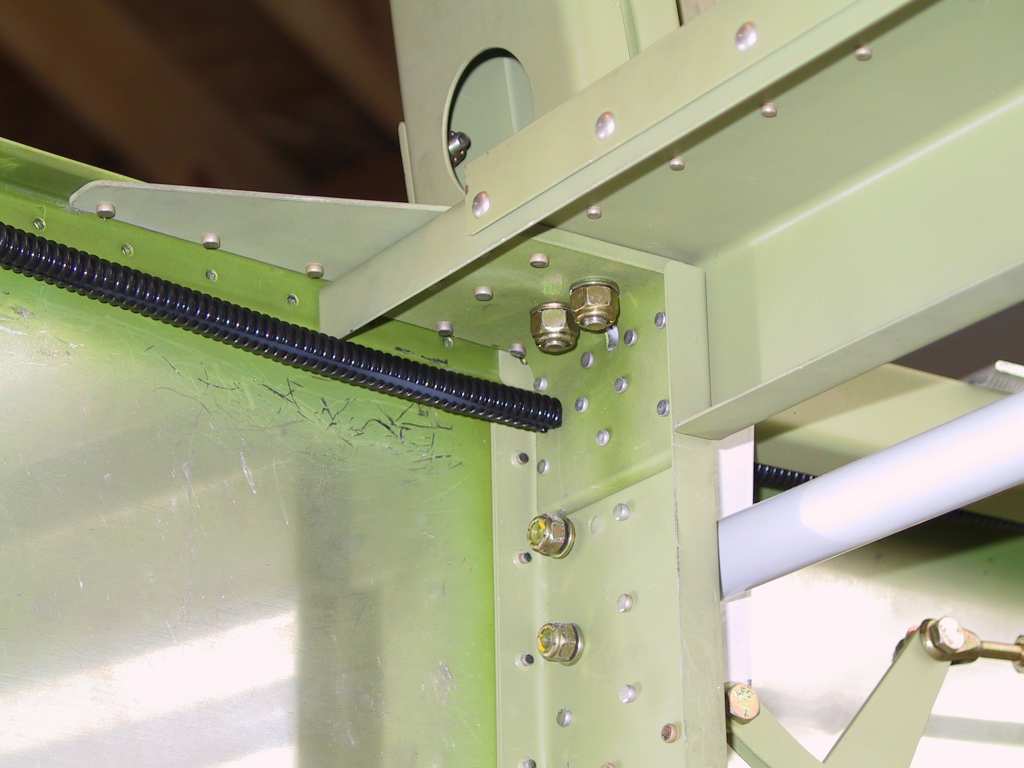
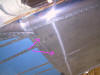
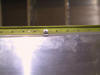
| 7/5/04 |
I finally made a decision on where to run the pitot line
though the F-705 bulkhead assembly. I chose to drill a 1/4" hole
through the F-705G-L angle and F-705D bulkhead side channel. I
drilled it on the outside of the two center most rivets. The static
line passes through the hole perfectly with no slop. I also
fabricated a few aluminum clips to hold the static line securely between
the F-706 and F-707 bulkheads along the longerons. I placed some 1/4
inch id conduit around the static line where it chafes against the bottom
of the F-705 channel.
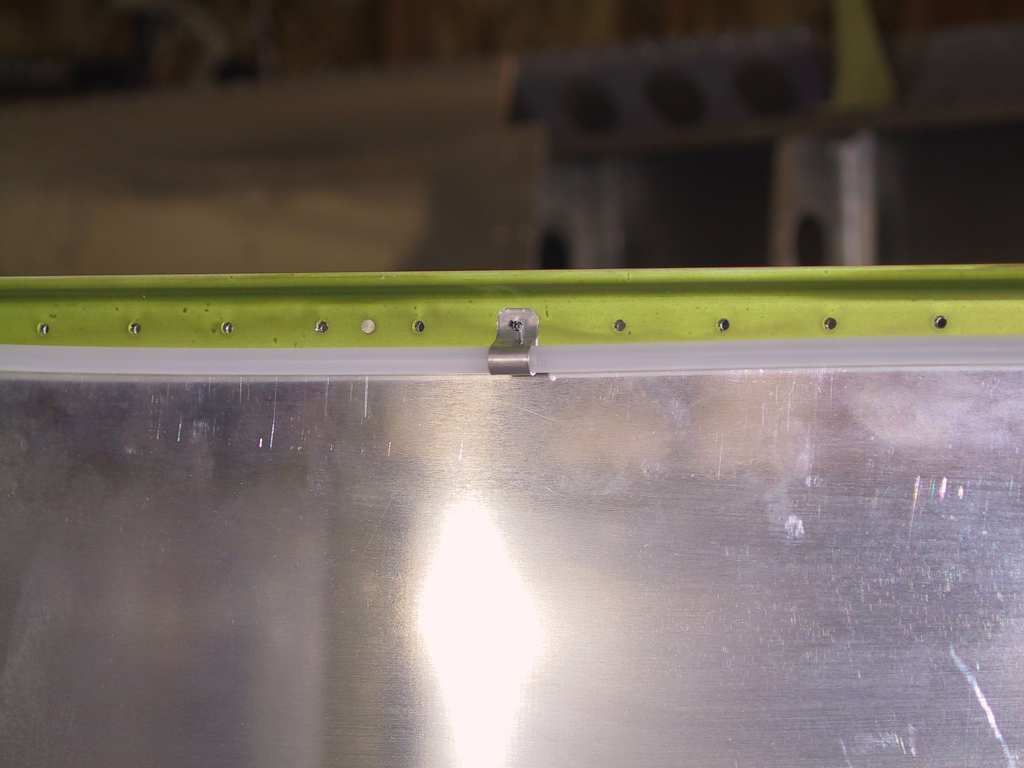
Going forward I wrapped the entire static line with a continuous sleeve
of the corrugated conduit and passed it under the forward and aft canopy
decks. There is plenty of room for the static line and conduit to
pass above the center section assembly. It's perfectly out of sight.
    |
| 7/6/04 |
Ordered interior paint today from
Alliance Coatings Inc.
I ordered JetFlex Water-Reducible Polyurethane Dispersion paint from
Sherwin-Williams. It has a lot of advantages over Solvent based
paints, namely it won't kill you as fast. Plus you don't have to buy
reducer, just add water. I'm going with Gray Beige ( BAC 8813 ).
It matches perfectly the leather sample I got from
Classic Aero
Designs. So, I went ahead and ordered the seats from them as
well today. I'm feeling much lighter in the pocket today.
Sometime this week I hope to get my panel over the chromer to get it
powder coated. The panel color is just a bit darker than the
leather. The interior paint is just a bit lighter than the seats.
It should all work out well. Today I also received an order from
SteinAir. A bunch of misc parts, crimpers, pidg terminals, tools,
etc, etc. Then, I ordered some more from them today, wire,
terminals, etc, etc. It's like Christmas around here. |